
Why Does Veneer Color Look Awkward When It's Too White? Natural Tone Matching, Before and After
Hello. I'm Park Jonguk of Dream Dental Clinic in Apgujeong.
There's a question that comes up most often from patients coming in for a veneer consultation.
"Just give me the whitest color." "Make them dazzling white like a celebrity." "Just have the doctor pick the color."
All three are starting points that can lead to an awkward-looking result.
Veneer color isn't decided simply by ‘how white it is.’
Value, saturation, translucency, and surface texture. Depending on how these four combine,
the result can be a natural-looking smile, or it can give an artificial impression that says ‘this person clearly got dental work done’ at a glance.
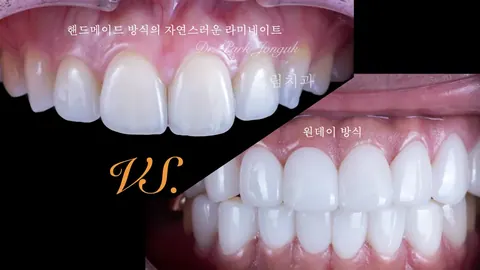
Today, I'll compare the difference between a mistaken color choice and a natural color choice
using a before/after framework.
Why veneer color determines the result
A veneer is a thin piece of ceramic, 0.3 to 0.7 mm thick.
The color has to be expressed within that thin thickness.
That's exactly where the problem starts.
If the color is set too dark, it looks flat.
If the color is set too light, the area around the gums shows through gray.
A natural tooth isn't a single color.
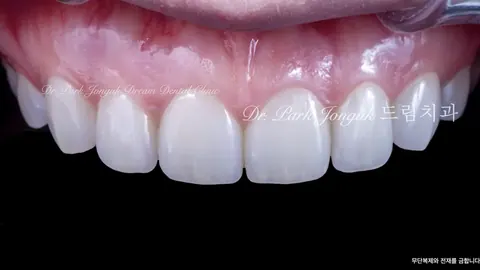
The tip of the tooth (the incisal edge) is more translucent, while the cervical area (near the gums) is darker.
Without preserving this gradation, a veneer ends up looking like a ‘tooth-shaped sticker.’
3 patterns that make color look awkward
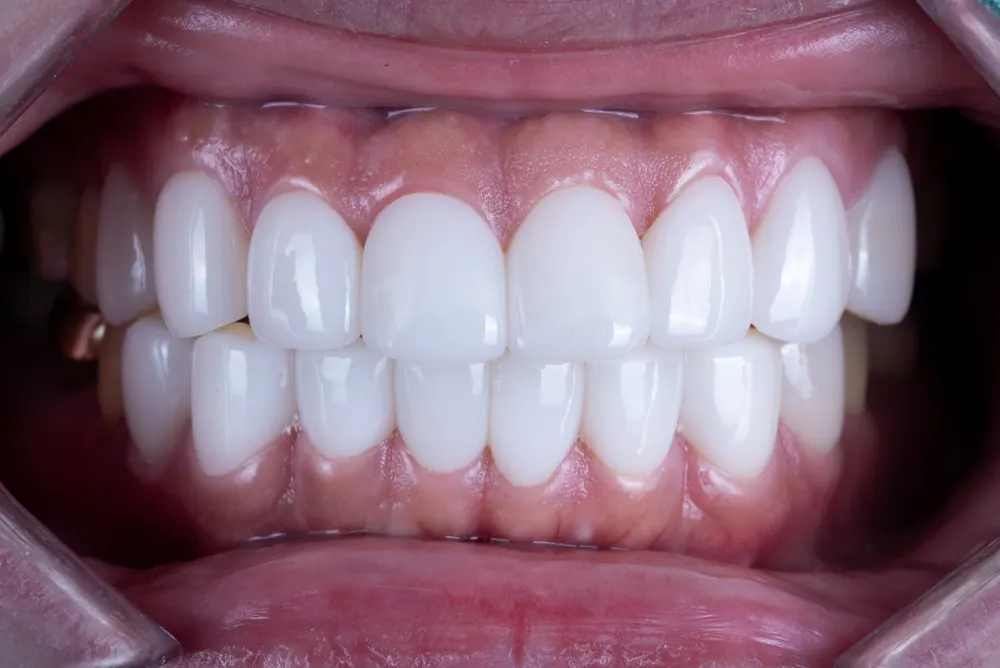
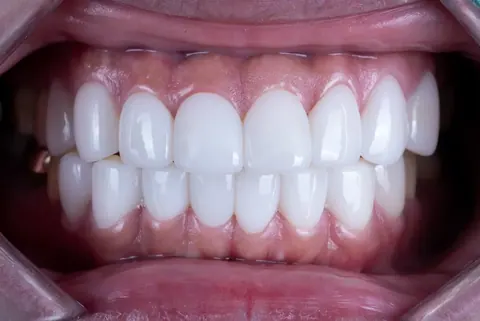
1. When every tooth is the exact same dazzling white
This is actually the pattern we see most often in the clinic.
This is a case where a shade brighter than VITA A1, a so-called ‘BL (bleach) color,’ was applied identically to every tooth.
In cases like this, from a distance the teeth look like a flat ‘slab.’ The three-dimensionality disappears.
It stands out even more under lighting. In photos, the teeth are the only thing that pops.
2. An opaque color with no translucency
A veneer that light can't pass through gives an oppressive, heavy impression.
A natural tooth has a kind of ‘depth’ where light enters and exits.
Without that depth, it ends up feeling like the teeth of a porcelain doll.
3. A dark color all the way to the incisal edge (the tip)
When the tooth tip is too dark, it looks strong. But it's unnatural.
A natural tooth shows a slight bluish or grayish tint toward the tip.
Miss this detail, and the veneer ends up looking like a ‘uniformly colored bar.’
4 conditions for a natural color
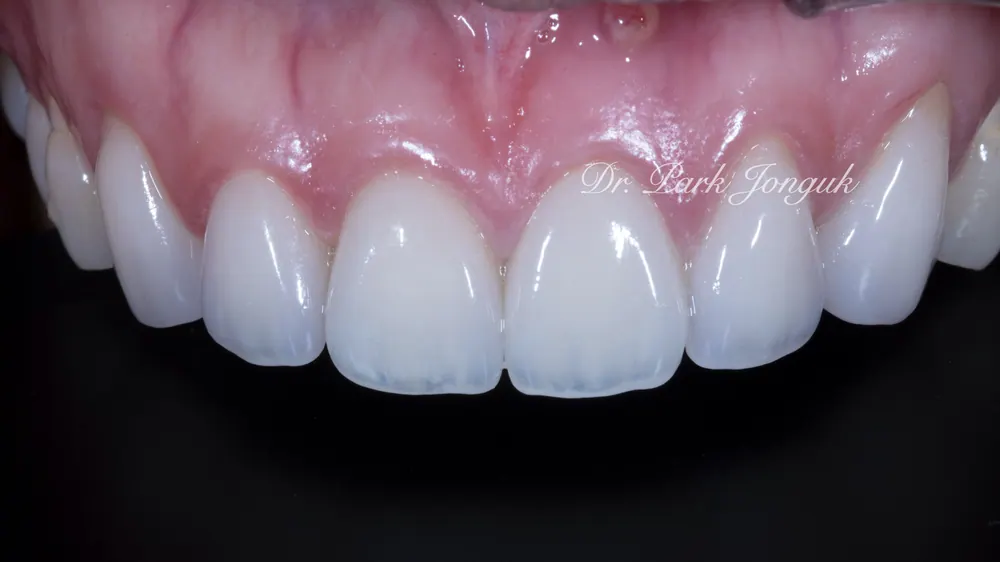
A natural-looking veneer has the following four qualities.
1. Value: one shade brighter
Going about 1 to 2 shades brighter than the existing tooth color looks the most natural.
It's decided within a range that matches your own skin tone, gum color, and the whites of your eyes.
2. Saturation: a touch of warmth
A 100% neutral, achromatic white doesn't exist in a natural tooth.
A subtle hint of yellow, a subtle warmth, has to remain for it to look like a real tooth.
3. Translucency: light passing through the incisal edge
The translucent layer at the tooth tip (incisal translucency) has to be preserved.
A build-up veneer creates this layer by stacking it up by hand, one layer at a time.
4. Surface texture: subtle contours
A natural tooth's surface isn't perfectly smooth.
Fine horizontal ridges (perikymata) absorb and scatter light.
Preserve this detail, and light will break up naturally in photos.
Common mistakes when choosing a color
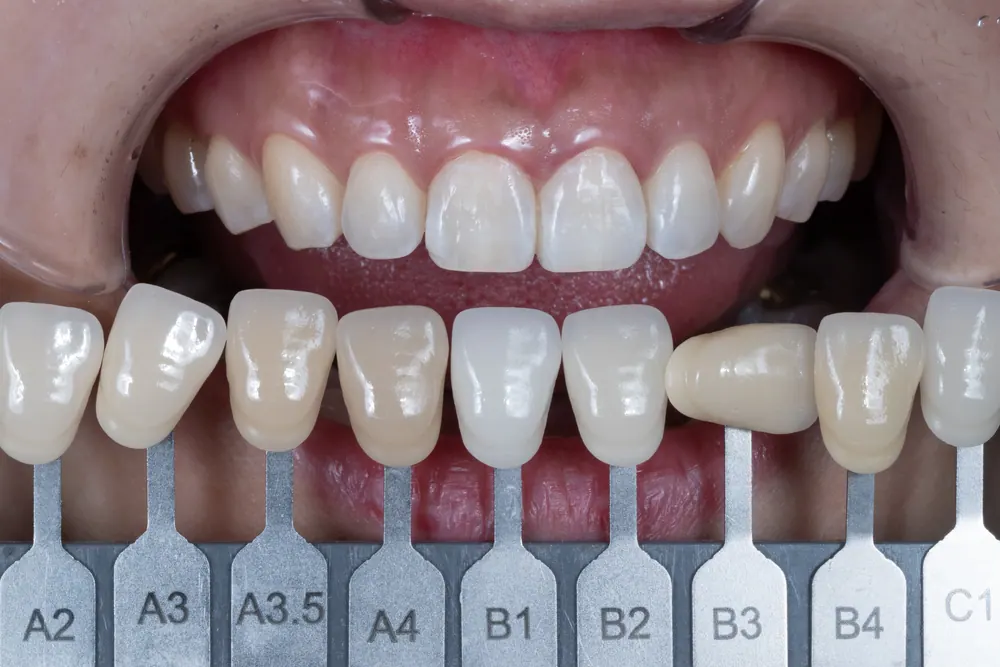
First, deciding based only on the mirror.
The color in the mirror is the color under fluorescent light. It looks different in sunlight or under cafe lighting.
In the clinic, we compare the shade under three types of light: natural light, fluorescent light, and LED.
Second, following a color recommended by a friend or family member.
With a different skin tone, lip color, or gum color, the same shade can look completely different.
Third, applying ‘just like celebrity so-and-so’ directly.
A color that works under broadcast makeup and studio lighting may not suit an everyday environment.
Color matching ultimately comes down to ‘balance’
Veneer color isn't about turning up the intensity of white.
It's about balancing the color with your own natural teeth, the adjacent teeth, your skin tone, and your gum color.
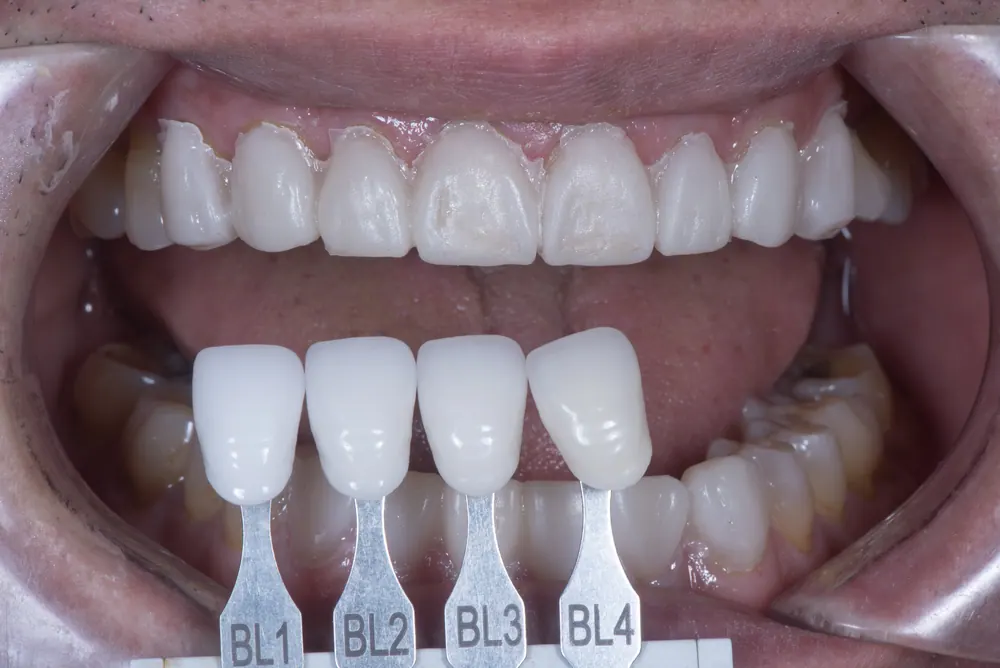
During treatment, I decide the shade together with the patient.
We compare shade guides under natural light,
and if needed, simulate the result in advance with temporary veneers (wax-up, mock-up).
Looking, comparing, and looking again before deciding on a color is where naturalness begins.
Frequently asked questions
Q1. Once a veneer is placed, is it hard to change the color?
Once a veneer is bonded on, it's difficult to touch up the color afterward.
Because it's not a method of painting over the top,
changing the color requires removing the existing veneer and fabricating a new one.
That's why deciding the shade correctly the first time matters most.
Q2. I have a special occasion coming up, like a wedding or job interview. Can the shade be set brighter for that?
It's possible to set it about 1 shade brighter than usual for photos on the day.
But going brighter than that can look awkward in everyday life.
What matters is finding a balance that suits both the special occasion and everyday life.
Q3. Does veneer color change over time?
The ceramic veneer itself does not discolor.
However, the border area between the veneer and the natural tooth,
and the adjacent natural teeth, can discolor over time.
With regular checkups and care for the color of the natural teeth as well, the color balance can be maintained for a long time.
In closing
Veneer color should be decided based on ‘how natural it looks,’ not ‘how white it is.’
Taking enough time when deciding on the color.
Going through a simulation to see it. Comparing it under natural light.
These three things are where a natural-looking veneer begins.
I hope today's article is helpful to anyone who has been struggling with this color decision.
Park Jonguk, Director, Dream Dental Clinic, Apgujeong
Graduate of Seoul National University School of Dentistry / Master's Degree in Dentistry
Board-certified specialist in conservative dentistry
Director of Education, Korean Academy of Adhesive Dentistry
Author of 『최소 삭제를 위한 라미네이트 임상』 (Minimal-Reduction Veneer Clinical Practice)
Director, Lamista Academy
This article is a clinical note written by Dr. Park Jonguk of Dream Dental Clinic, Gangnam; the original was published on his blog. The photographs shown are real cases he treated. Results vary with each patient’s condition, and every procedure carries the possibility of individual variation and side effects.
Quick Consult
Request a Callback
Leave your number and we will call you back during clinic hours.
Request Received
We will contact you during clinic hours. For urgent matters, please call +82-2-3448-0028.