
A Look at the Actual Veneer Retreatment Process
If you've already had veneer treatment and now find that your gums bleed often when brushing, or the gum area looks red and inflamed, or you're unhappy with the shape, or a veneer has fractured or come off, retreatment is needed.
The most important thing in veneer retreatment is, naturally, resolving whatever the underlying problem is — inflammation if the cause is inflammation, an esthetic issue if the cause is esthetic. I'll cover the precise diagnostic methods for addressing these causes in more detail in a future post. Today, I'd like to walk through the actual treatment process for veneer retreatment.
One of the most important steps here is "removing the veneer." The key question is how to remove the ceramic as effectively as possible while minimizing damage to the natural tooth underneath.
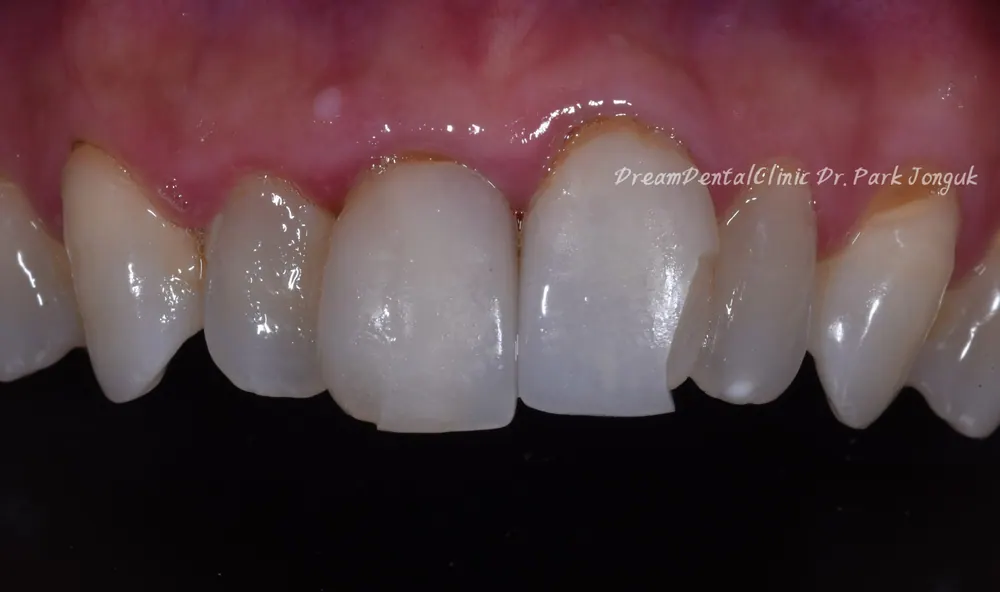
When a veneer fractures like this, it needs to be removed and retreated.
First, an esthetic analysis and diagnosis are carried out for the retreatment. As mentioned earlier, I'll cover this part in more detail in a future post.
After that, the veneer removal process is needed. What matters here is separating only the ceramic cleanly from the tooth.
By the textbook, the standard answer for the removal method is simply "grind it away."
The problem is whether there's any safeguard that can reduce damage to the tooth while grinding it away like that.
The better made a veneer is, the harder it is to distinguish from the tooth, so quite often you think you're removing the ceramic when you're actually grinding away the tooth itself. Ideally, only the veneer would come off cleanly, but the better the bond, the harder it is to remove.
Having personally done a great deal of veneer retreatment, I've studied and researched extensively how to remove veneer ceramic while minimizing damage to the tooth.
Among the many methods, the most successful one so far has been removal using a special laser. Since its effectiveness has also been validated in numerous papers, I believe applying it clinically poses no problem.
It requires a great deal of know-how and takes longer than simply grinding it away blindly, but I believe it's the safest way to remove the ceramic.
Here, the laser's role is to dissolve the adhesive used to bond the veneer to the tooth — in dentistry it's called "cement," though many people, on hearing that word, picture the gray material used on walls.
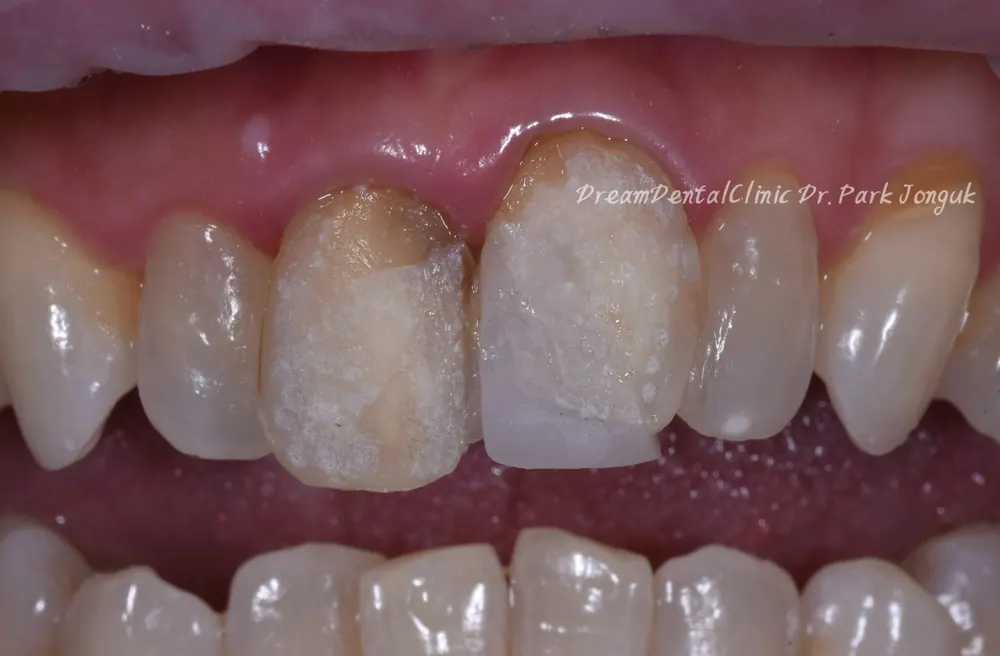
In this way, the ceramic is removed and what's left is the whitened, softened resin adhesive. From there, gradually removing that resin adhesive completes the veneer removal while keeping damage to the tooth to a minimum.
Let's look at another example.
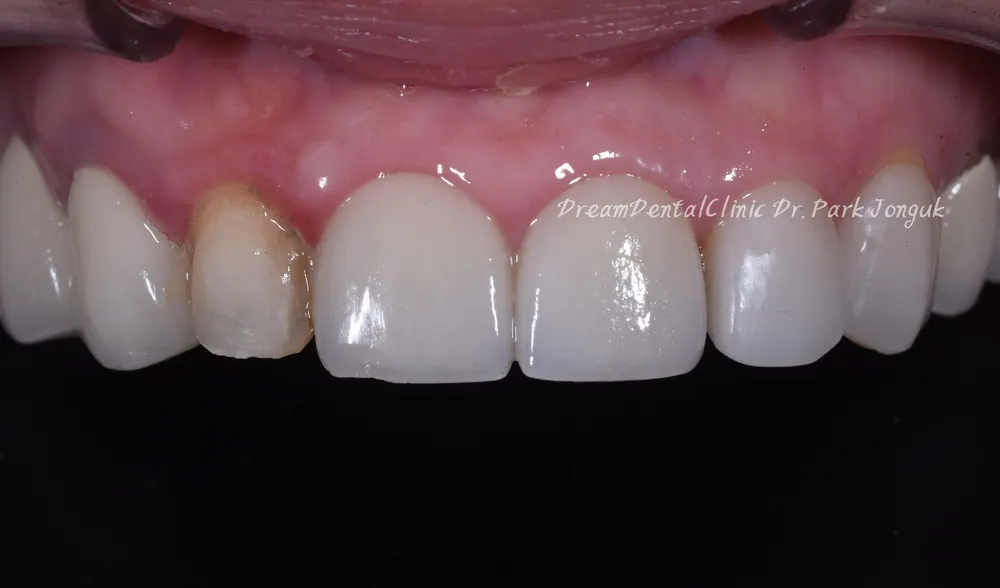
The patient came in after an old veneer had come off. The debonding itself was a problem, but the size and color of the two front teeth also didn't match, so overall esthetic satisfaction was bound to be low.
As before, a diagnostic process for retreatment was carried out.
The veneer was then removed using the laser.
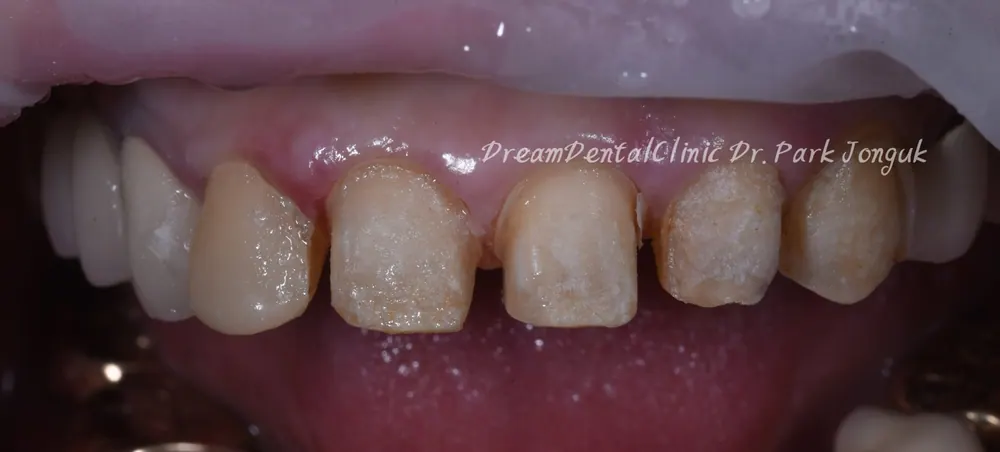
The whitish area, as mentioned earlier, is where the adhesive has softened. From this state, only the adhesive is slowly removed.
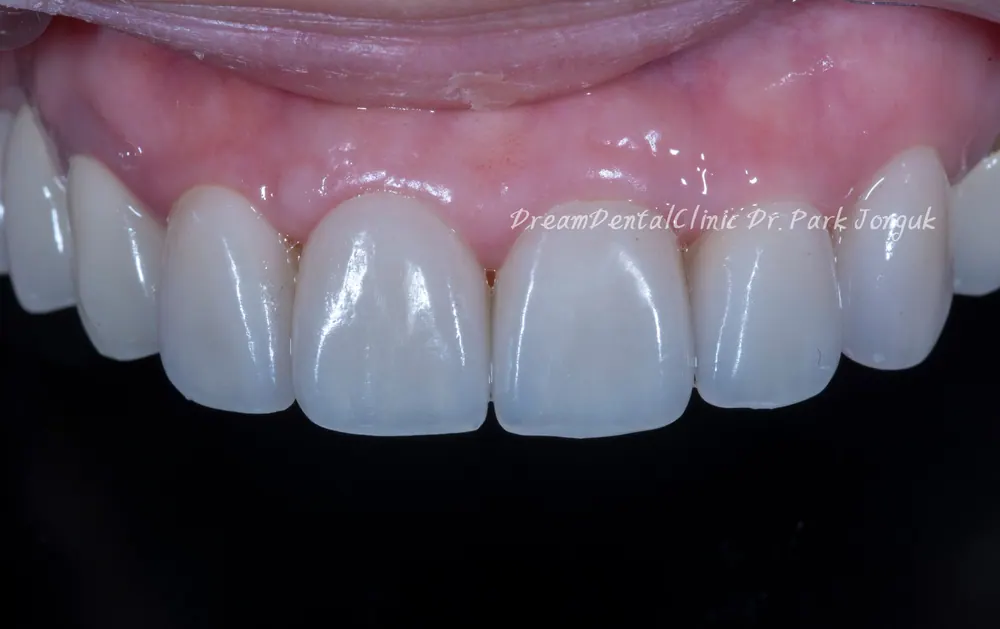
It was finished off with a natural shape and color like this.
As you've seen so far, one of the most important parts of veneer retreatment is the removal of the veneer ceramic. I believe the key is minimizing damage to the natural tooth during that removal.
Over 20 years of experience, I've done a great deal of research, read a great many papers, and pulled it all together to find the best method.
I'll continue researching this area and always work toward better treatment.
This article is a clinical note written by Dr. Park Jonguk of Dream Dental Clinic, Gangnam; the original was published on his blog. The photographs shown are real cases he treated. Results vary with each patient’s condition, and every procedure carries the possibility of individual variation and side effects.
Quick Consult
Request a Callback
Leave your number and we will call you back during clinic hours.
Request Received
We will contact you during clinic hours. For urgent matters, please call +82-2-3448-0028.