
[No-Prep Veneers] Retroclined Teeth and a Chipped Front Tooth After Braces, 'The Dentist's Precision Design' Changes the Result
Hello. I'm Dr. Park Jonguk, a dentist who has focused on esthetic restoration of the front teeth in Apgujeong for 20 years. (28 years as a practicing dentist)
In veneer consultations, many patients say to me,
"Doctor, I absolutely don't want a single bit of tooth cut."
But the most ethical, most complete treatment, in my view, isn't mechanical no-prep for its own sake.
For the tooth's long-term stability and the best final esthetics,
refining only the necessary areas ever so slightly to maximize harmony with the restoration —
that 'precision-designed treatment' is my philosophy.
Today, through the case of a man in his 20s whose mouth looked cramped from a retroclined bite after braces,
and who then came to us after an unexpected accident chipped his tooth as well,
I'd like to look in detail at how pre-treatment diagnostic planning shapes a patient's smile for life.
1. Why a 'Micro-Reduction' Plan Instead of No-Prep? (The Art of Diagnosis)
[Photo 1] Before treatment — retroclined teeth and a chip after braces
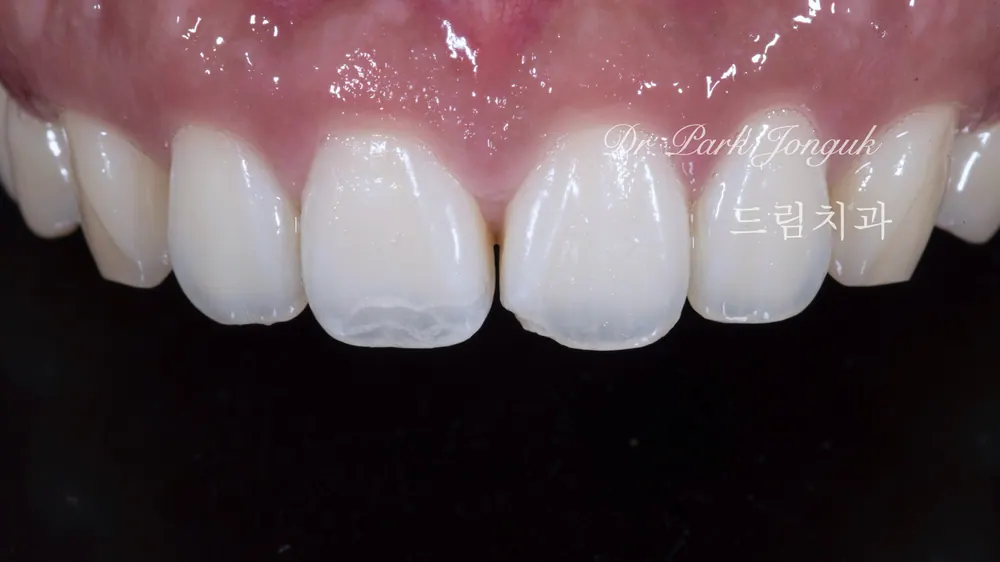
The patient had completed orthodontic treatment in the past,
but the angle of his teeth had tilted inward into what's called a retroclined, or 'ok-ni,' bite.
With a retroclined bite, the teeth barely show when smiling, which can easily give a gloomy impression.
To make matters worse, he'd fallen and chipped part of a front tooth, compounding the esthetic damage.
Because retroclined teeth sit inward, leaving extra room, they're an excellent indication
for no-prep veneers, which simply add a veneer onto the surface.
But this is exactly where a dentist's deep consideration and expertise need to come into play.
[Photo 2] Precision pre-treatment planning — a design led personally by the dentist
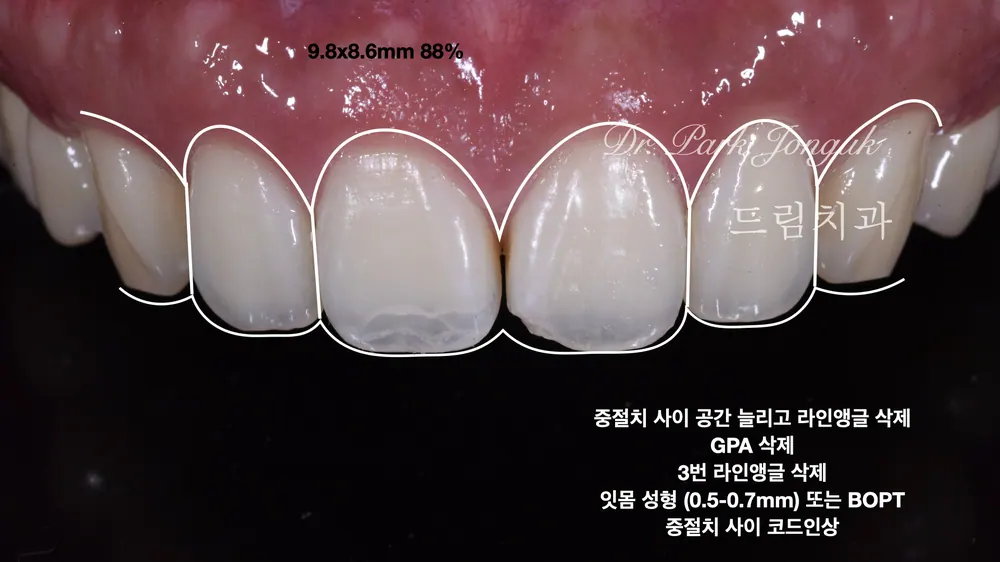
If a restoration is simply placed on top of the tooth, the result can look bulky,
and the tooth's dimension can break down, making it obviously look like something was bonded on.
Before sending an order to the dental lab, I personally carry out the following process.
Analyzing the relationship between the face and the teeth:
Rather than looking only inside the mouth, I first determine the midline of the whole face,
the movement of the lips, and how much tooth shows when smiling.
Adjusting the canine's line angle:
This patient's canine had a very pronounced three-dimensional border, or line angle.
If a veneer were made while leaving that protruding line as is, the canine alone would end up sticking out awkwardly.
Design led by the dentist:
I never vaguely ask the dental technician to just "make it pretty."
I measure the correct proportions of the teeth and set out a 'reduction plan down to 0.1mm'
that finely refines the canine's sharp angle, and only then do I order the wax-up.
2. The Synergy of Microscope-Guided Precision and the Wax-Up
[Photo 3] Result of the precision wax-up diagnosis
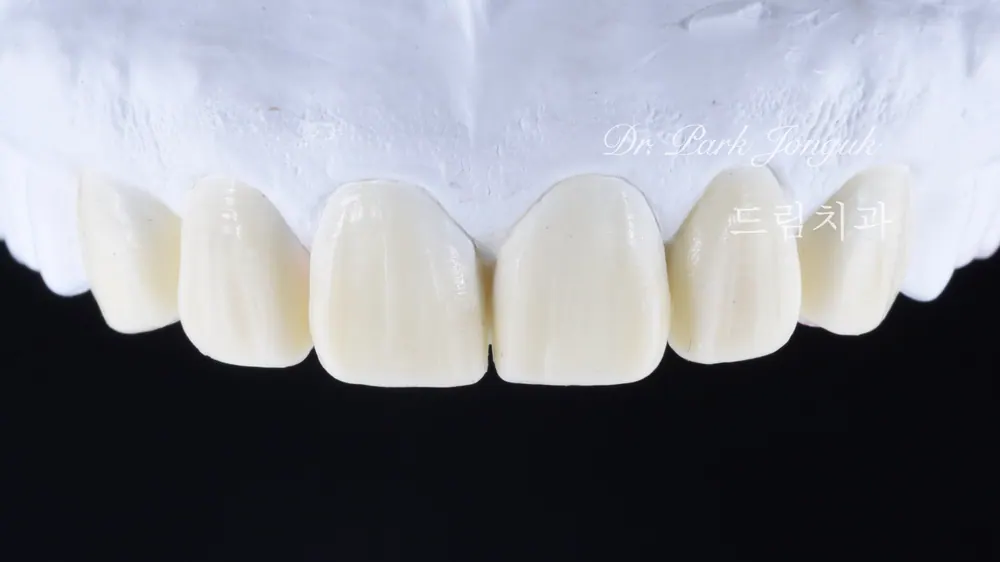
This is the result of the precision wax-up diagnosis, realized by the technician based on the dentist's design.
Rather than starting from how much to reduce,
we first sculpt in wax the 'ideal final shape for this patient,'
and then work backward to calculate the minimum space needed to achieve that shape.
This is the secret to cutting the least amount of tooth while still producing the most beautiful result.
[Photo 4] After micro-reduction using a microscope
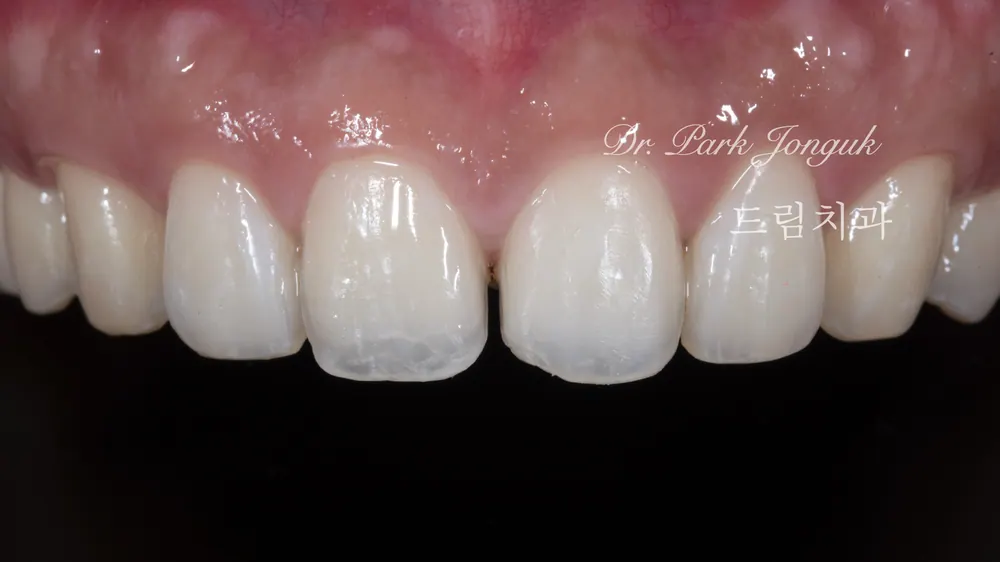
This is the state after completing the micro-reduction according to the planned scenario.
I use a precision microscope to minimize the amount of reduction.
The nuance of a combined procedure:
This case mixes teeth with absolutely no reduction with teeth that had a tiny amount of reduction for shape correction.
It's a careful balance that preserves the patient's tooth health without sacrificing esthetic completeness.
3. The Vitality Handmade Build-Up Brings (Photos 5-12)
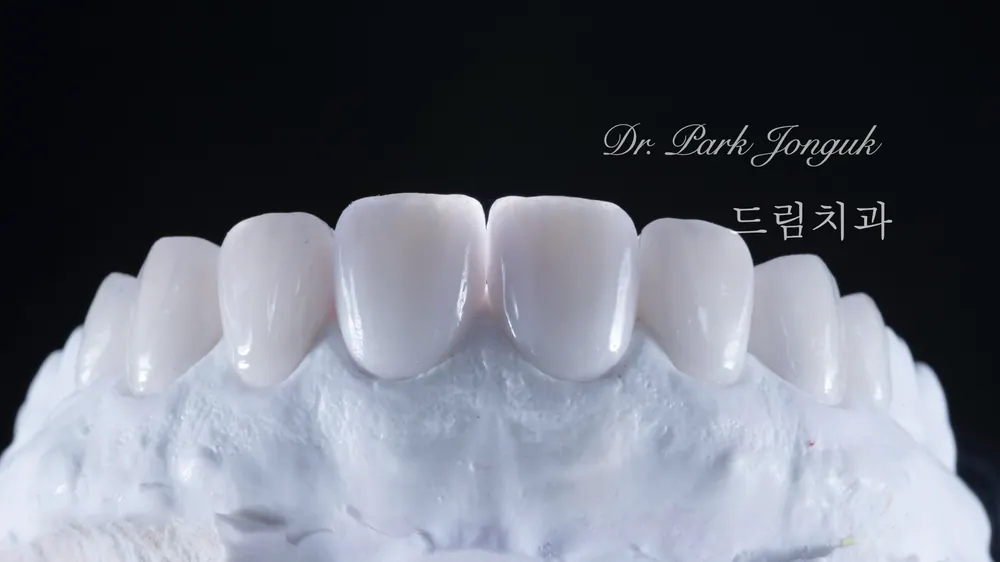
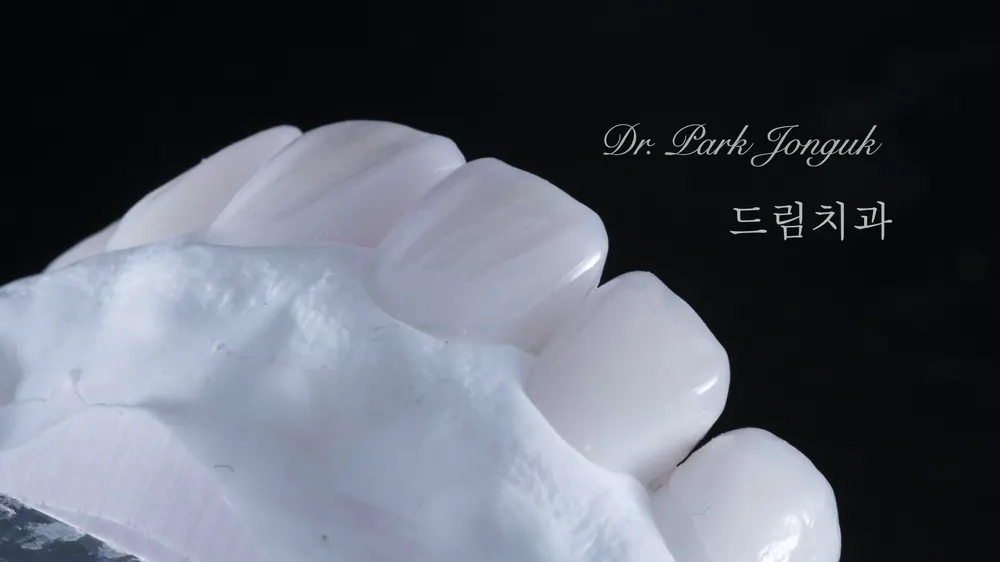
[Photos 5, 6, 7, 8] The precisely fabricated veneers
![[No-Prep Veneers] Retroclined Teeth and a Chipped Front Tooth After Braces, 'The Dentist's Precision Design' Changes the Result — photo 6](/column-media/224115555361/06.webp)
![[No-Prep Veneers] Retroclined Teeth and a Chipped Front Tooth After Braces, 'The Dentist's Precision Design' Changes the Result — photo 8](/column-media/224115555361/08.webp)
The handmade build-up method we insist on
is on a completely different level from a machine-milled method.
Color and translucency:
A natural tooth isn't a single color.
From the opaque inner layer of the tooth to the clear, translucent outer layer,
we built it up by layering countless ceramic powders, one on top of another.
Recreating the texture:
We carefully sculpted the surface texture
so that even the way it reflects light resembles a natural tooth.
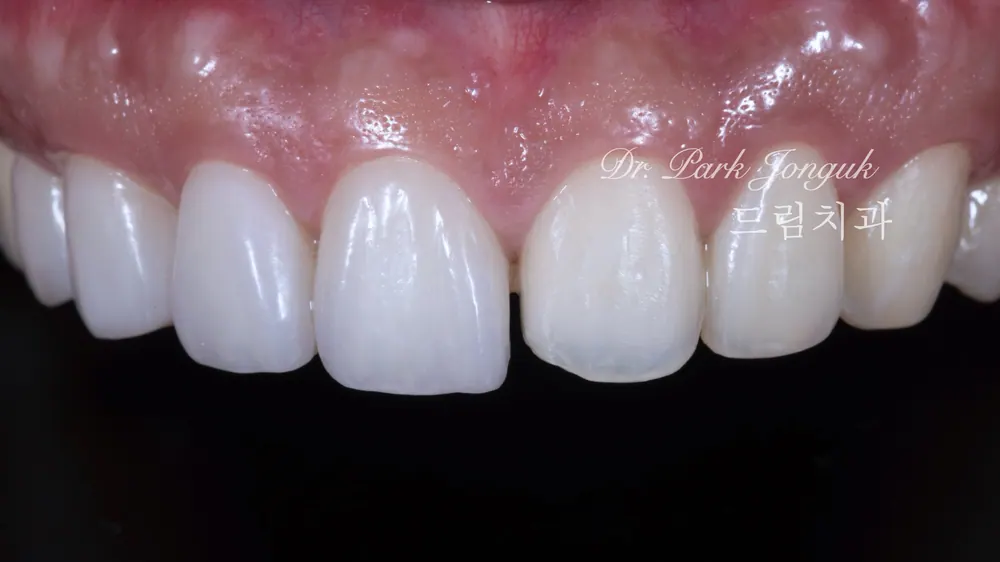
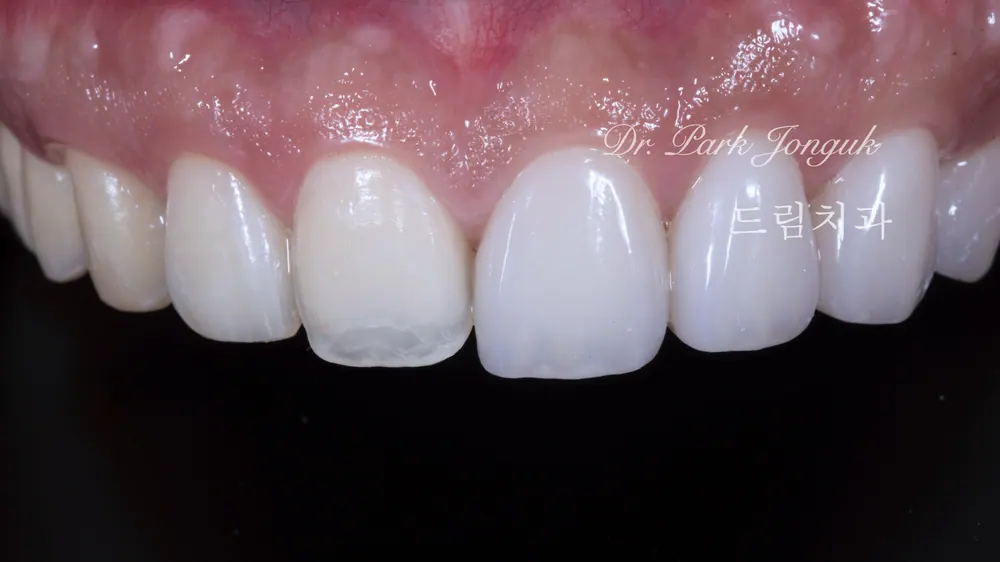
[Photos 9-12] The step-by-step try-in process
![[No-Prep Veneers] Retroclined Teeth and a Chipped Front Tooth After Braces, 'The Dentist's Precision Design' Changes the Result — photo 10](/column-media/224115555361/10.webp)
![[No-Prep Veneers] Retroclined Teeth and a Chipped Front Tooth After Braces, 'The Dentist's Precision Design' Changes the Result — photo 12](/column-media/224115555361/12.webp)
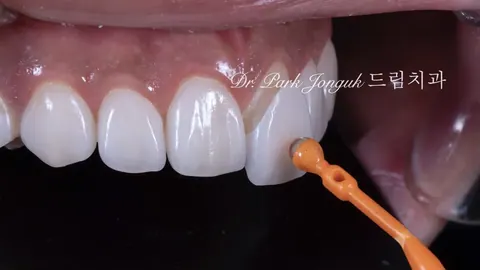
We place the right- and left-side veneers on individually to make a final check of the harmony with the surrounding teeth.
You can see the once-retroclined teeth regain their proper angle, filling out the smile line.
This is a level of precise matching only possible because it's handmade.
4. After Treatment: A Bright, Clear Smile Completed (Photos 13-17)
[Photos 13, 14, 15] After final seating
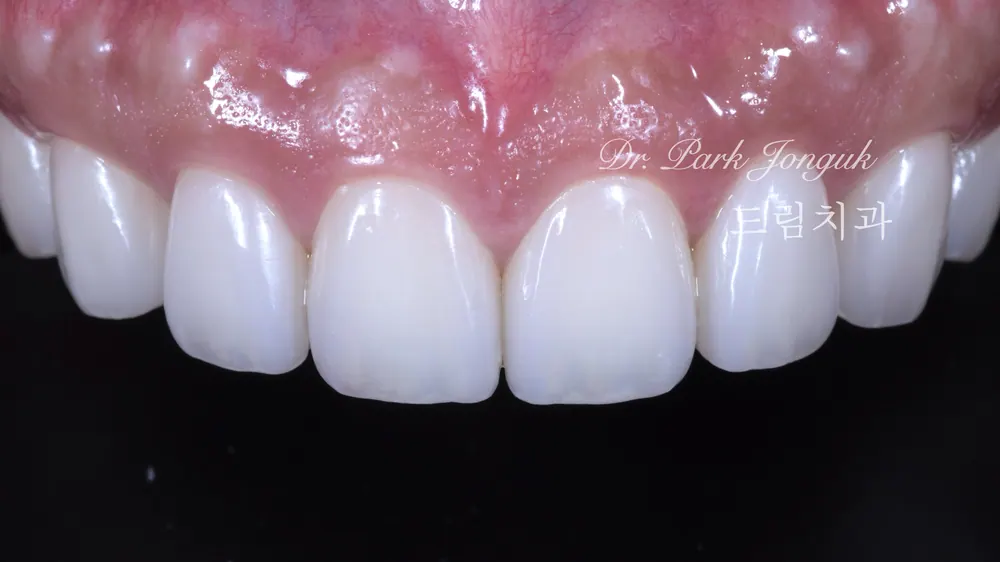
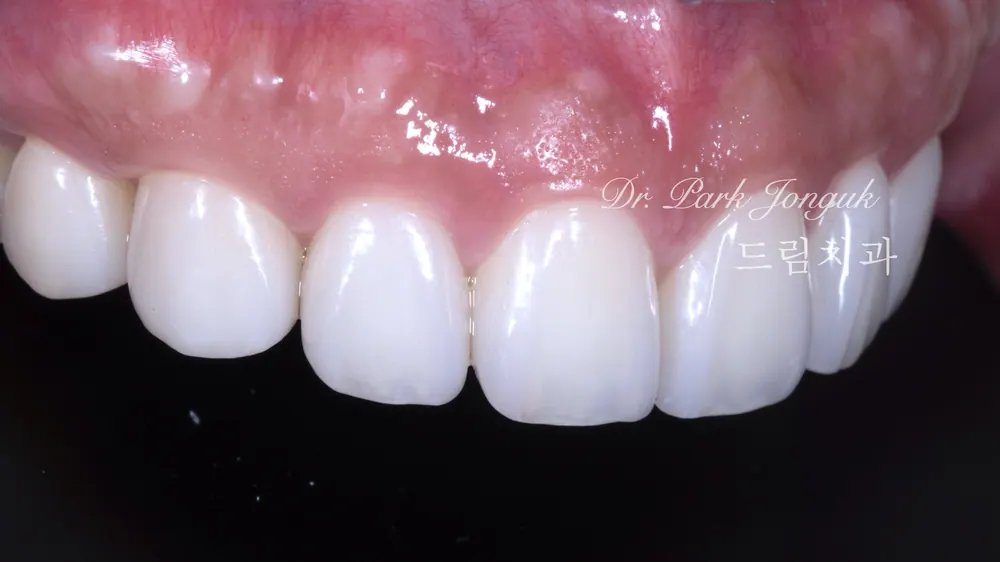
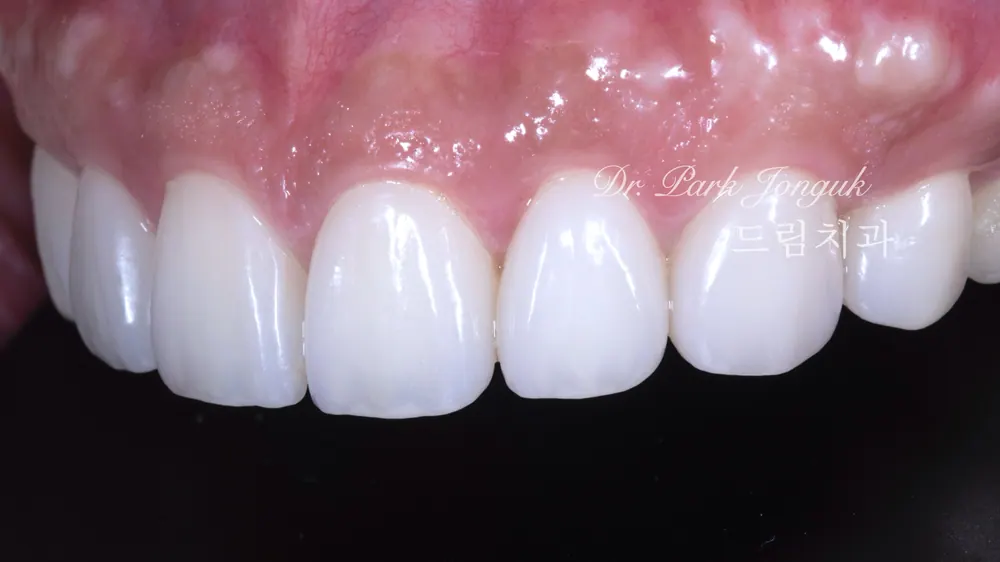
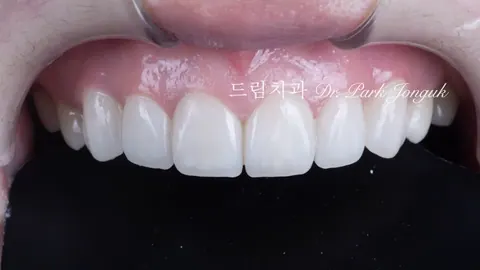
The result after treatment goes beyond simply looking "white"
and gives an impression of being "clear and translucent."
The cramped look typical of a retroclined bite disappeared, proper volume returned to the teeth, and the whole mouth looks far more open.
The chipped area was also restored seamlessly.
[Photos 16, 17] Detail of the surface texture
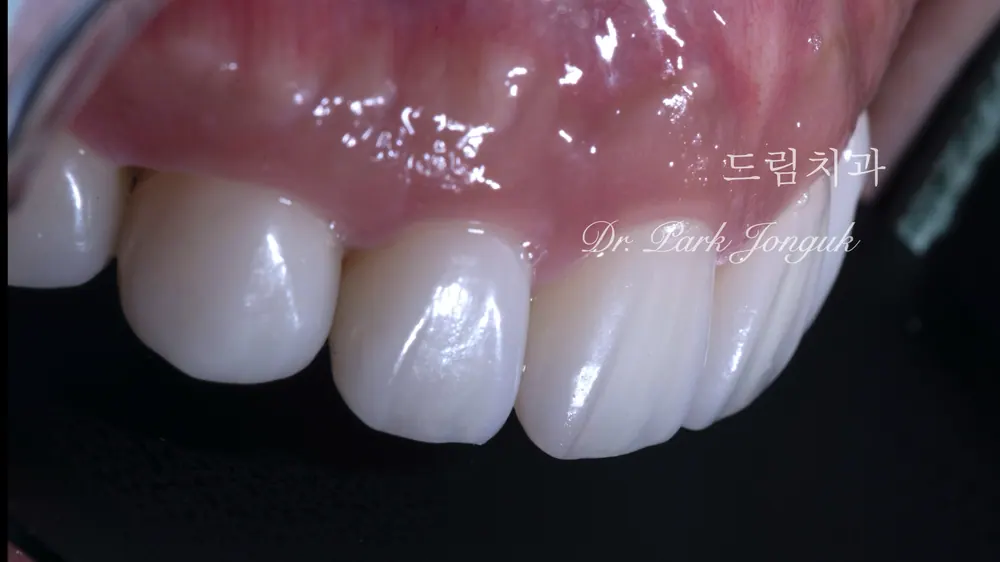
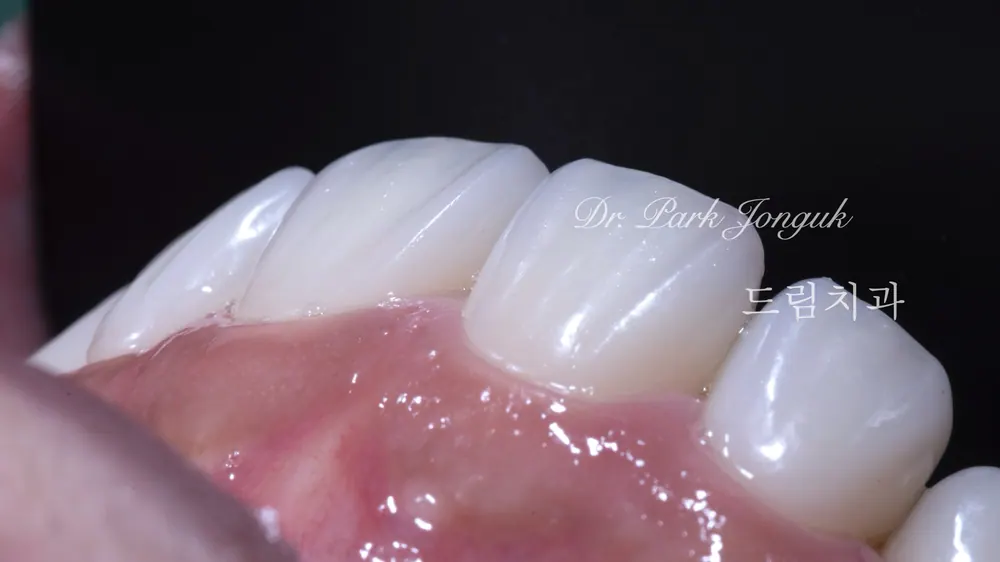
Please pay attention to the surface texture visible in these close-up photos.
A natural tooth has subtle surface irregularities that scatter light.
Because we preserved that texture faithfully, it doesn't look glossy or artificial under lighting,
and instead has the natural sheen of the patient's own tooth.
Conclusion: Treatment Designed by the Dentist, Not Left to the Technician
The quality of front-teeth veneers doesn't come from leaving everything entirely up to the dental lab.
The dentist personally deciding and directing the tooth size, angle, and extent of reduction
so that it all harmonizes with the patient's face — that process is the key.
Are you struggling with a retroclined bite after braces, or a tooth that suddenly chipped?
Rather than the simple yes-or-no choice of whether to reduce the tooth,
find a specialist who can precisely design a smile that fits your own face.
With 28 years of clinical experience and 20 years of esthetic expertise, I will complete your smile in the healthiest way possible.
💡 Front-Teeth Veneer Q&A
Q1. Please explain in more detail why reduction is needed even for a retroclined bite.
A. With a retroclined bite, there's usually enough room to add on, but a specific edge of the tooth (the line angle) is often protruding.
If a restoration is bonded on without refining that protruding part, even by 0.1mm,
the whole tooth can end up protruding too far forward, or the border with the neighboring tooth can look unnatural.
Think of it as a 'sculpting' step to create a natural curve.
Q2. Does the handmade build-up method take longer to make than a standard method?
A. Yes, it takes more time than a machine-milled method.
That's because a skilled technician has to build up the powder, layer by layer, by hand under a microscope,
and go through the firing process.
But in return, the depth and translucency it shows under light are exceptional, in a class of their own.
Q3. Can leaving a retroclined bite untreated after braces cause functional problems too?
A. A retroclined bite can create an awkward relationship between the upper and lower teeth,
and depending on the case, it can put strain on the jaw joint or accelerate wear on the front teeth.
Using veneers to establish the proper tooth angle and length can help not only esthetically,
but also toward forming a more stable bite.
This article is a clinical note written by Dr. Park Jonguk of Dream Dental Clinic, Gangnam; the original was published on his blog. The photographs shown are real cases he treated. Results vary with each patient’s condition, and every procedure carries the possibility of individual variation and side effects.
Quick Consult
Request a Callback
Leave your number and we will call you back during clinic hours.
Request Received
We will contact you during clinic hours. For urgent matters, please call +82-2-3448-0028.