
Veneer Redo: From Chipped Veneers to a Natural Smile
Hello, I'm Park Jonguk, director of Dream Dental Clinic in Apgujeong.
Today I'd like to introduce a case where a patient found a new smile through a veneer redo.
It's the story of a patient who had a redo because her old veneers were chipped, dull in color, and oddly shaped.
Old Veneers, One of Them Chipped
This patient had veneers placed on her front teeth long ago — 4 on top and 4 on the bottom.
That's a total of 8 front teeth with veneers.
The problem was that one of her upper front teeth had chipped, so she came in to have it redone.
When a veneer fractures, bacteria can get in, and it also compromises the esthetics.
The Chip Wasn't the Only Problem
Looking closely, the chip wasn't the only issue.
The color was dull, and the shape was off as well.
The patient said, "I wanted them to be natural and bright."
Not just plain white, but a natural brightness with translucency and dimension was what she wanted.
On Examination, It Was Practically a Crown, Not a Veneer
I was genuinely surprised when I examined her existing veneers.
On examination, they were called veneers, but they were practically crowns.
A veneer typically requires reducing the tooth by only about 0.3 to 0.5mm, but this patient's teeth had been reduced far more than that.
In the past, there were clinics that, based on the amount of reduction, were essentially doing all-ceramic crowns while calling them veneers.
They would tell patients it was a "veneer," while in reality reducing the tooth as much as they would for a crown.
They said this because veneers simply have a better image.
But this amounts to deceiving the patient.
Before Treatment: Dull, Awkward Veneers
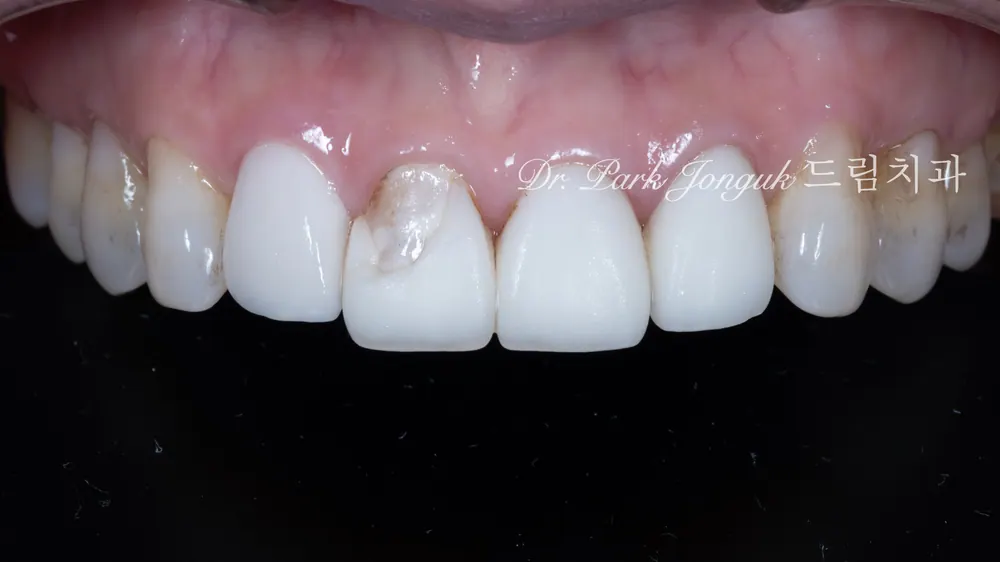
Photo 1 shows the upper teeth before treatment.
The color is dull and opaque.
There's no translucency at all, so the teeth look lifeless.
The shape is also uniform and monotonous.
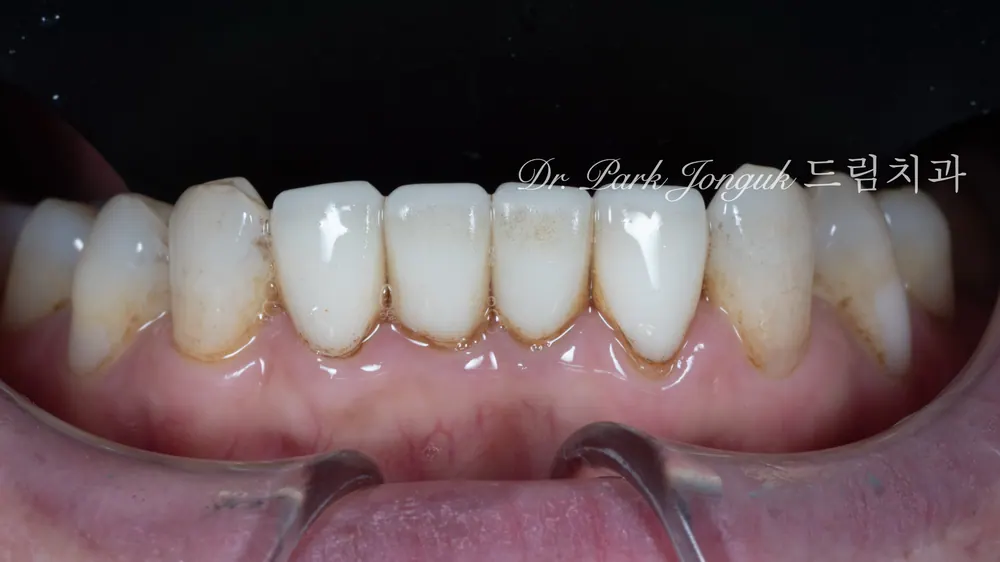
Photo 2 shows the lower teeth before treatment.
The lower teeth are just as dull and awkward-looking as the upper ones.
Both the upper and lower teeth needed a redo.
Designed to Perfection With a Wax-Up
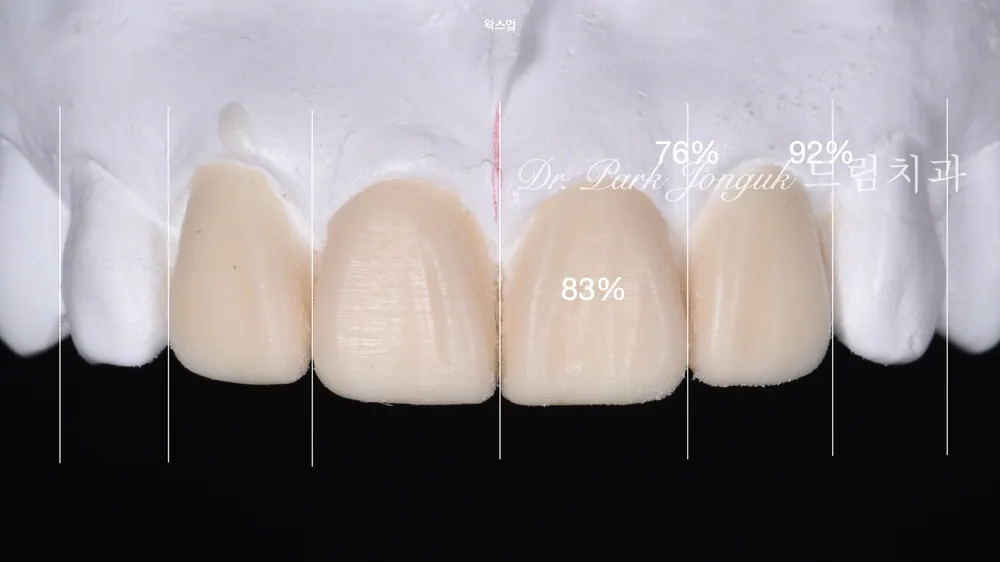
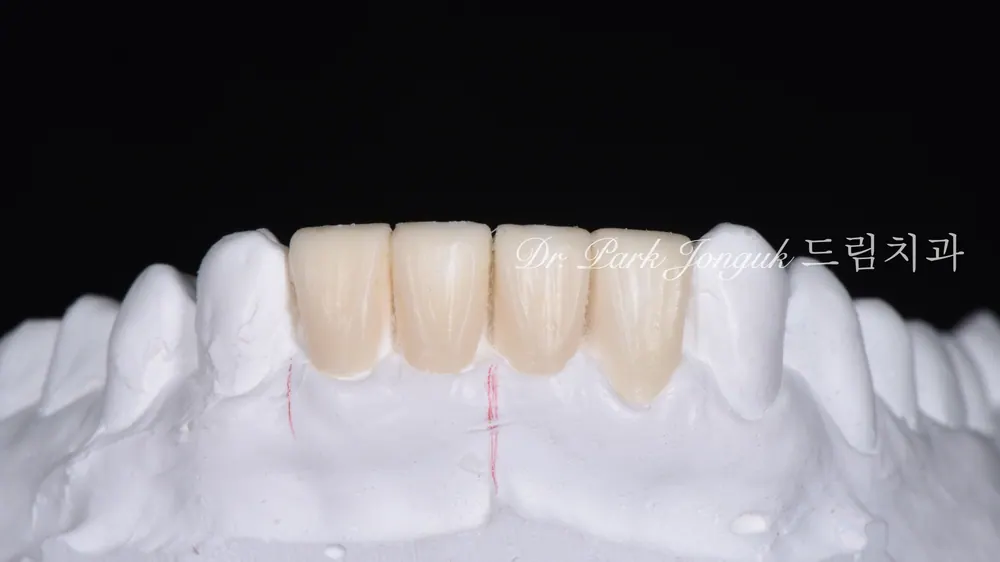
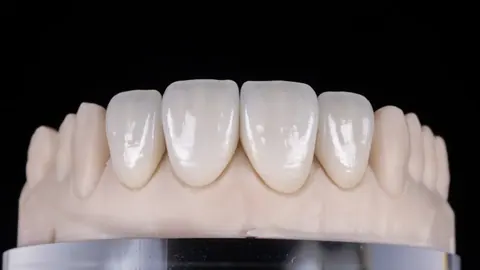
Photo 3 shows the result of the precision wax-up diagnosis.
This is the process of previewing what the teeth will look like after treatment.
I, Park Jonguk of Dream Dental Clinic in Apgujeong, analyzed the patient's face shape, lip line, and smile curve.
The size, proportions, and shape of the teeth were designed to perfection.
A natural shape, a bright color, and translucency were all planned in advance.
When the patient saw the wax-up model, she was delighted and said, "Now I can finally have natural-looking teeth."
Removing the Veneers: A Shocking Amount of Reduction
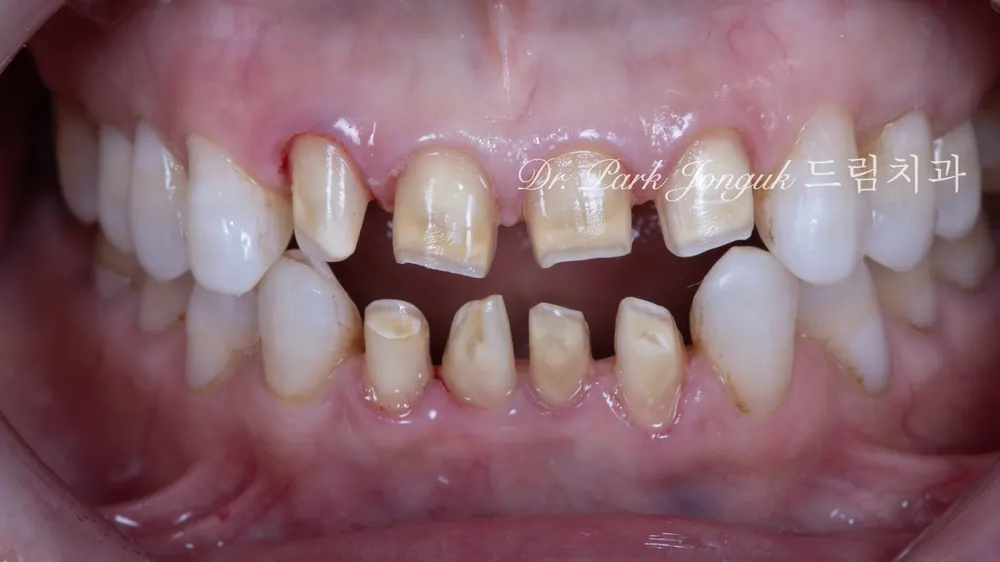
Photo 4 shows the teeth after the veneers were removed.
The existing veneers were safely removed using a laser.
And what we found was shocking.
The amount of tooth that had been reduced was enormous.
The teeth had been shaved down to sharp points, like awls.
A veneer only requires reducing 0.3 to 0.5mm, but this looked like 1.5 to 2mm or more had been removed.
This is the level of reduction you'd expect for an all-ceramic crown.
It was a genuinely heartbreaking situation.
To think that healthy teeth had been damaged like this.
But we decided to make the most of what remained of the tooth structure to create the best possible result.
Fabricated Naturally With Handmade Build-Up
I fabricated the new veneers using the handmade, multi-layer build-up method.
This is a method where multiple layers of ceramic are built up one on top of another.
On the inside, a core layer in a dentin shade was created.
In the middle, a translucent layer in an enamel shade was built up.
At the incisal edge, transparent ceramic was applied.
Fine surface characterizations were expressed on the outer layer.
Only by building up these multiple layers can you create the same translucency and three-dimensionality as a natural tooth.
After Treatment: A Completely New Smile
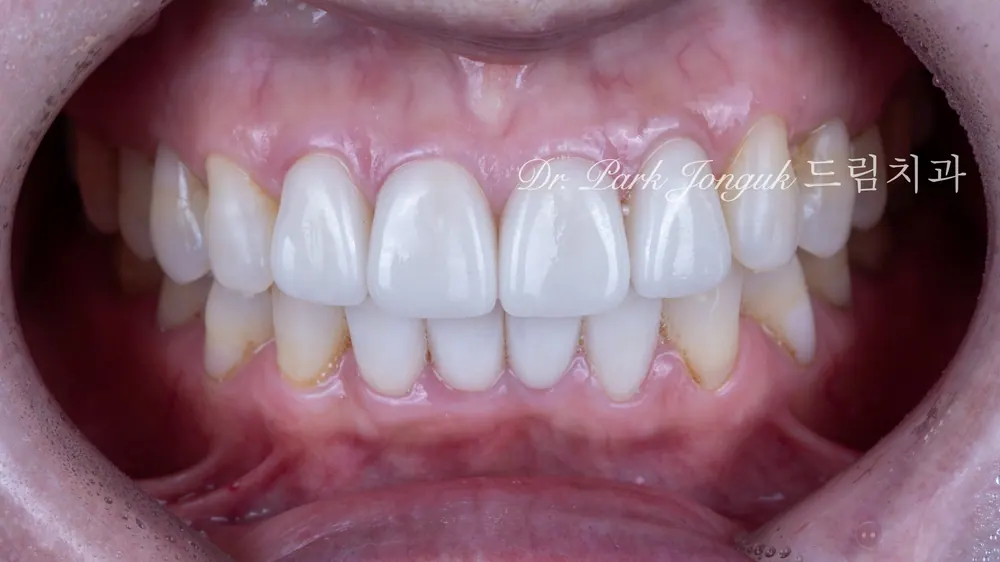
Photo 5 shows both the upper and lower teeth after treatment.
Both the upper and lower teeth were treated to perfection.
It's a truly remarkable transformation.
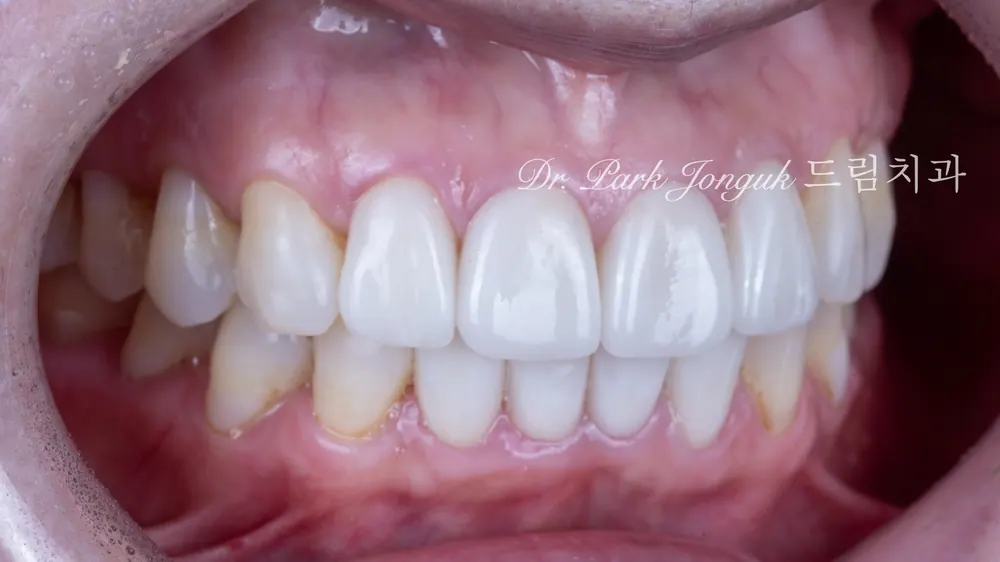
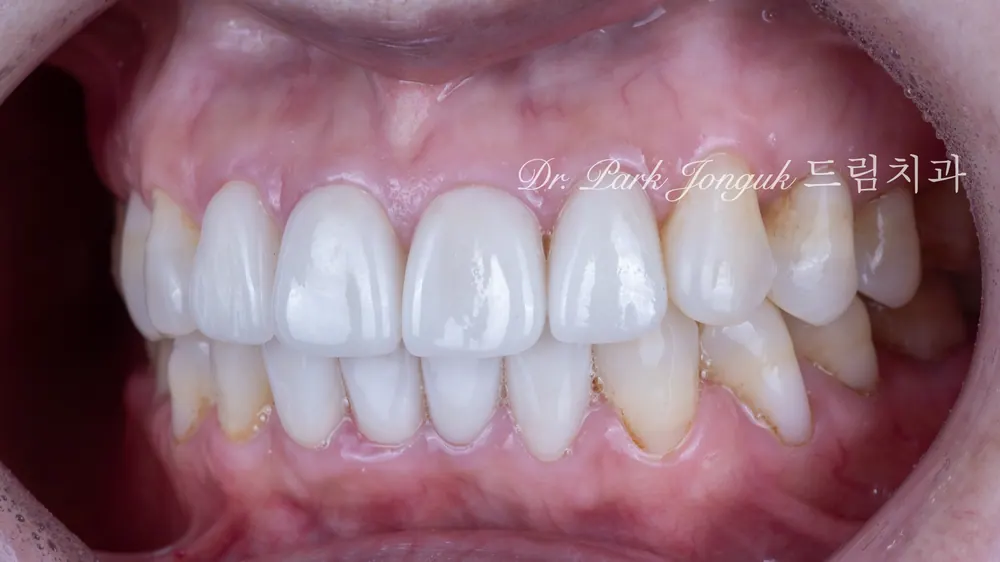
Photos 6 and 7 show the left and right sides of the upper and lower teeth.
They look natural and beautiful from any angle.
Photo 8 shows the upper teeth alone.
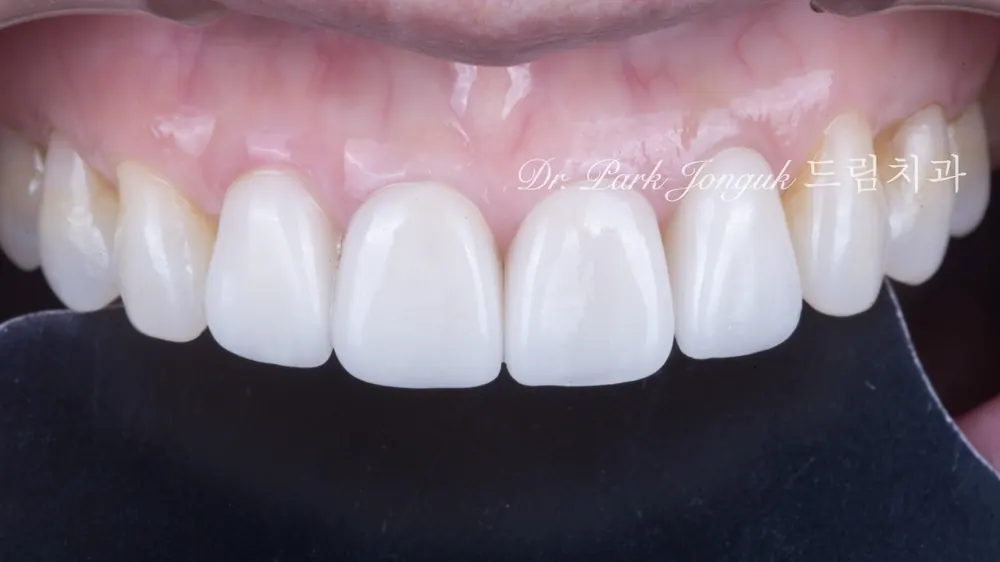
The upper teeth are now bright, translucent, and three-dimensional.
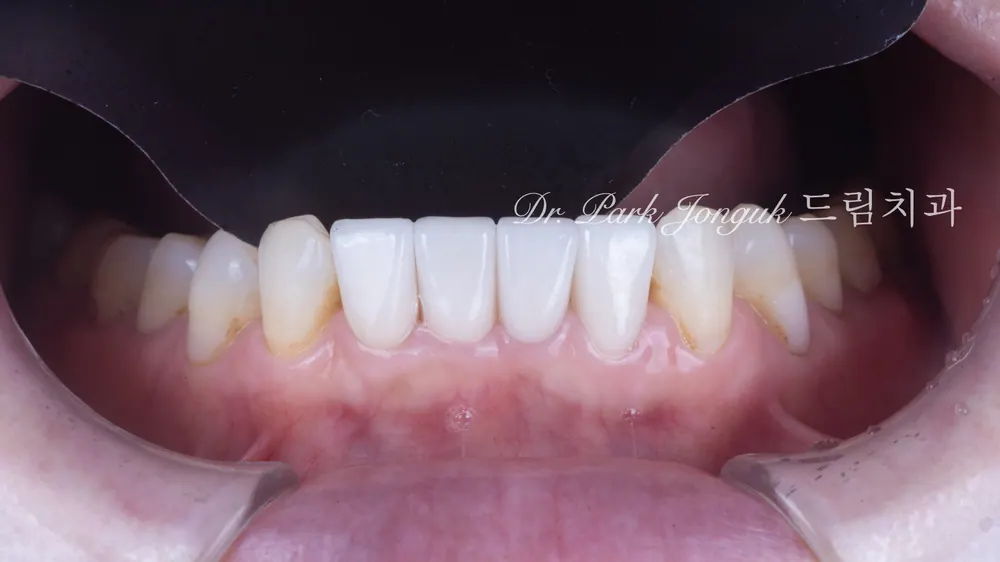
Photo 9 shows the lower teeth alone.
The lower teeth are in perfect harmony with the upper teeth as well.
Natural and Brighter
Compared to before treatment, it's like an entirely different world.
Bright, Translucent Color
The dull, opaque color has turned into a bright, clear color.
But it's not just plain white.
The translucency is alive, which makes it look natural.
The translucency at the incisal edge is beautifully expressed.
Light passes through the teeth and diffuses softly.
A Natural Shape
The once uniform, monotonous shape has become three-dimensional and dynamic.
Each tooth has its own unique character.
Developmental lobes, surface contours, and fine texture were all faithfully recreated.
They don't look flat — they feel full of life.
Perfect Harmony Between Upper and Lower
The upper and lower teeth are in perfect harmony with each other.
The color, shape, and size are all well balanced.
The smile as a whole is beautiful and natural.
20 Years of Experience: Park Jonguk of Dream Dental Clinic, Apgujeong
I have provided esthetic dental care in Apgujeong for 20 years.
I've successfully carried out a great many veneer redo cases.
I teach redo techniques to dentists every month at Lamista Academy.
I published Korea's first veneer textbook.
Even difficult redo cases like this one can be successfully resolved with experience and know-how.
Frequently Asked Questions (Q&A)
Q1. What if I was told it was a veneer, but a lot of my tooth was actually reduced?
A. A tooth that has already been reduced can't be restored, but a redo can still achieve a natural-looking result. We remove the existing restoration safely with a laser and make the most of the remaining tooth structure to fabricate a new veneer or crown.
Q2. Do I need to redo both the upper and lower teeth?
A. If there are problems with both the upper and lower teeth, it's best to redo them together. This allows for overall color harmony and shape balance, resulting in a more natural outcome.
Q3. What happens if I leave a chipped veneer untreated?
A. Bacteria can enter through the fractured area, leading to secondary decay, and the tooth can be damaged further. It's important to visit the clinic for a redo as soon as any chipping occurs, even if it seems minor.
This article is based on the real clinical experience of Park Jonguk, director of Dream Dental Clinic in Apgujeong. He has provided esthetic dental care in Apgujeong for 20 years and teaches veneer techniques to dentists every month at Lamista Academy. He has published Korea's first veneer textbook.
This article is a clinical note written by Dr. Park Jonguk of Dream Dental Clinic, Gangnam; the original was published on his blog. The photographs shown are real cases he treated. Results vary with each patient’s condition, and every procedure carries the possibility of individual variation and side effects.
Quick Consult
Request a Callback
Leave your number and we will call you back during clinic hours.
Request Received
We will contact you during clinic hours. For urgent matters, please call +82-2-3448-0028.