
Minimal-Reduction Veneers for Protruding, Uneven Teeth
Hello. I'm Park Jonguk, director of Dream Dental Clinic.
If teeth are protruding or uneven,
orthodontic treatment can correct the alignment.
The problem is that even after orthodontics,
sometimes things don't improve any further.
Because of a position problem with the lower teeth,
or because of the size of the jawbone, a protruding feeling can remain even after orthodontic treatment.
When the alignment before orthodontics wasn't good
and wear occurs between the teeth,
the worn teeth often end up looking awkward even after orthodontics.
Let's look at a case of minimal-reduction veneers done after orthodontics like this.
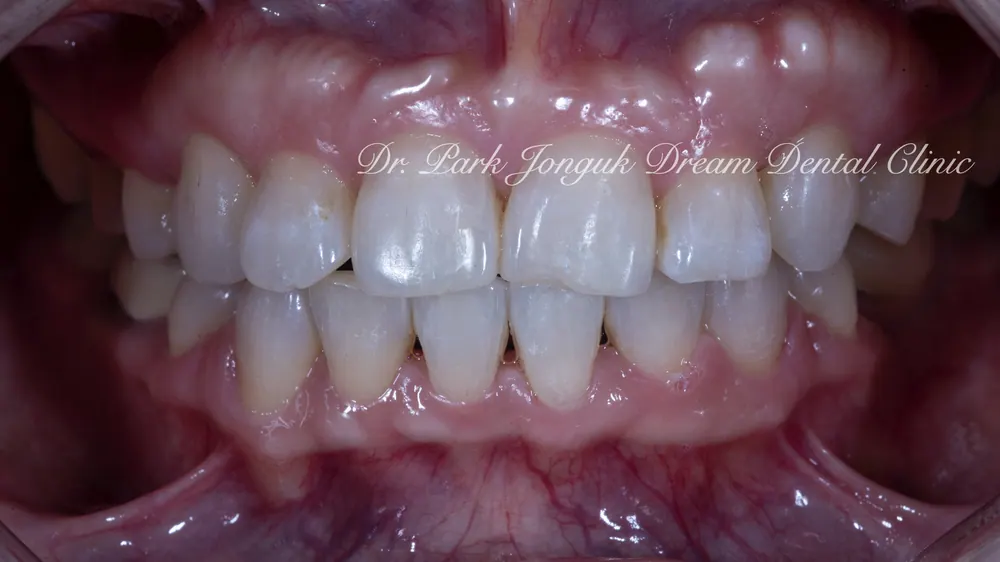
As I mentioned earlier,
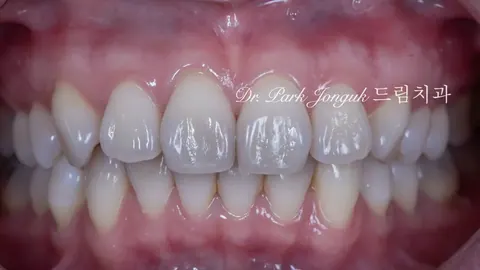
even after orthodontics, the lateral incisors (the teeth on either side of the front teeth) were protruding,
and the front teeth had worn down in an awkward way.
The teeth were also dark and yellowed in color.
In a case like this,
we proceed with minimal-reduction veneer treatment to correct the tooth color, shape, and the feeling of protrusion all at once.
There are two key methods here
for keeping tooth reduction to a minimum.
The first is that a precise diagnosis has to be done.
We have to carry out a precise diagnosis so that both the veneer result and the amount of tooth reduction
can be fully confirmed in advance.
The other point is that,
rather than a one-day method — designed by computer
and fabricated by machine —
hand-made veneers
can be made noticeably thinner,
so we should choose minimal-reduction veneers
made by a skilled, experienced ceramist.
Using the methods above, we move into diagnosis and treatment.
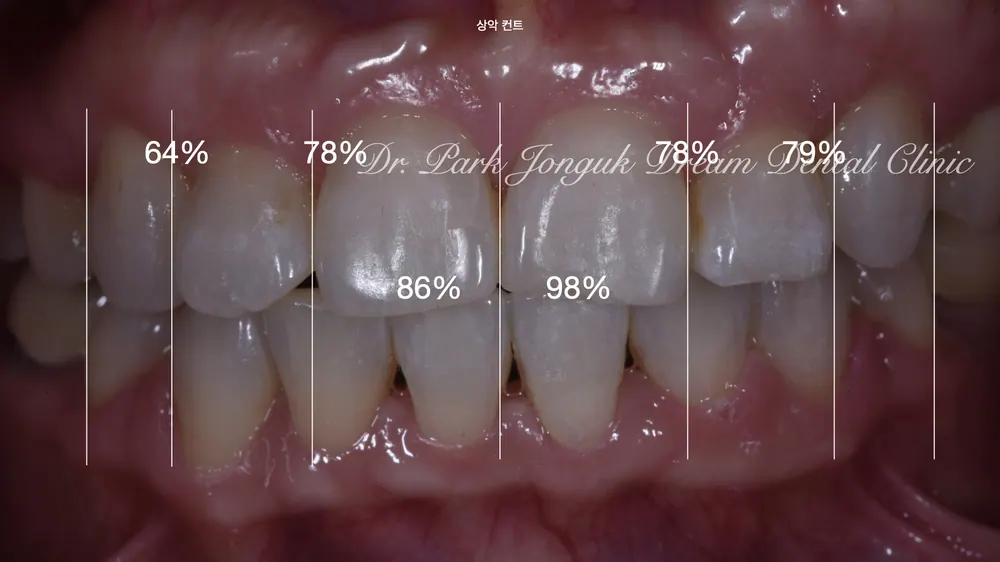
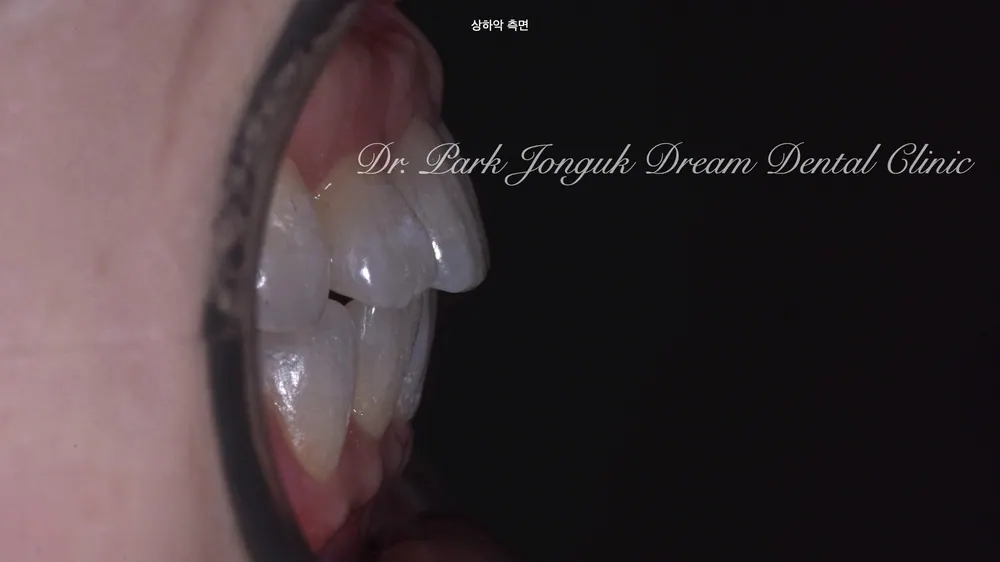
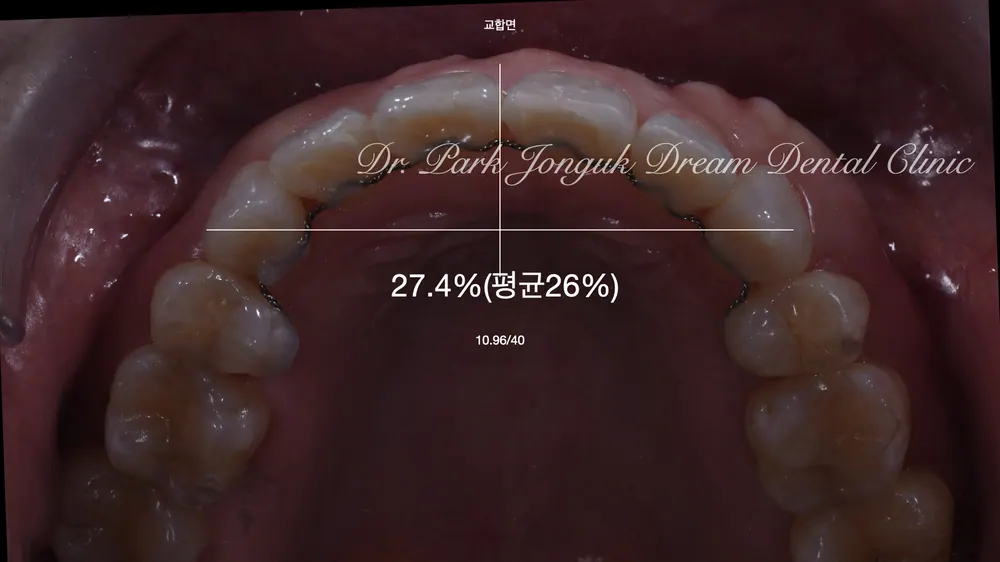
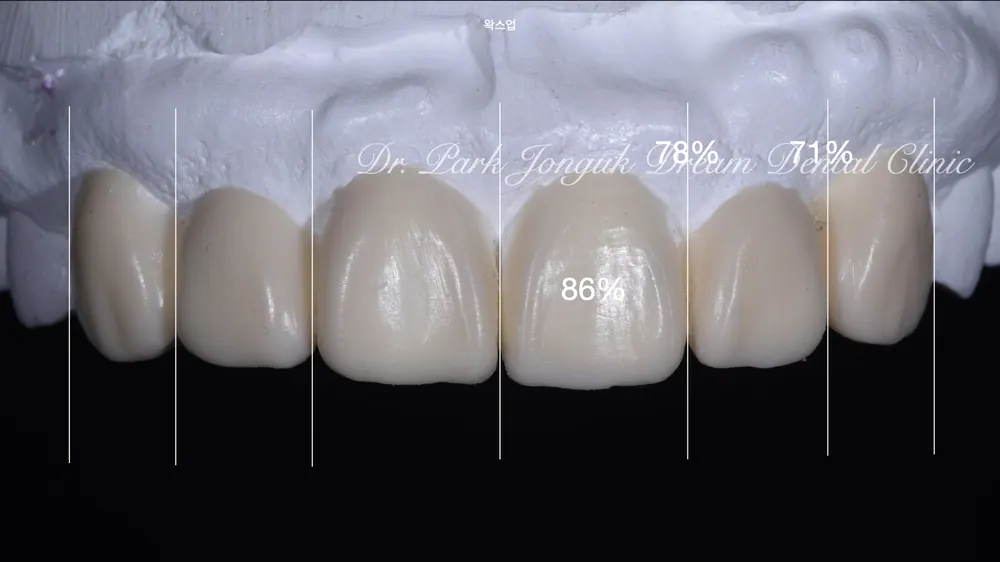
With the precise diagnosis complete and the amount of tooth reduction already decided,
we begin the minimal-reduction veneer treatment.
In addition to
the two methods for minimal reduction mentioned earlier,
there are a few more important things needed during treatment —
things to be careful about when actually reducing the teeth.
The first is that a guide has to be used.
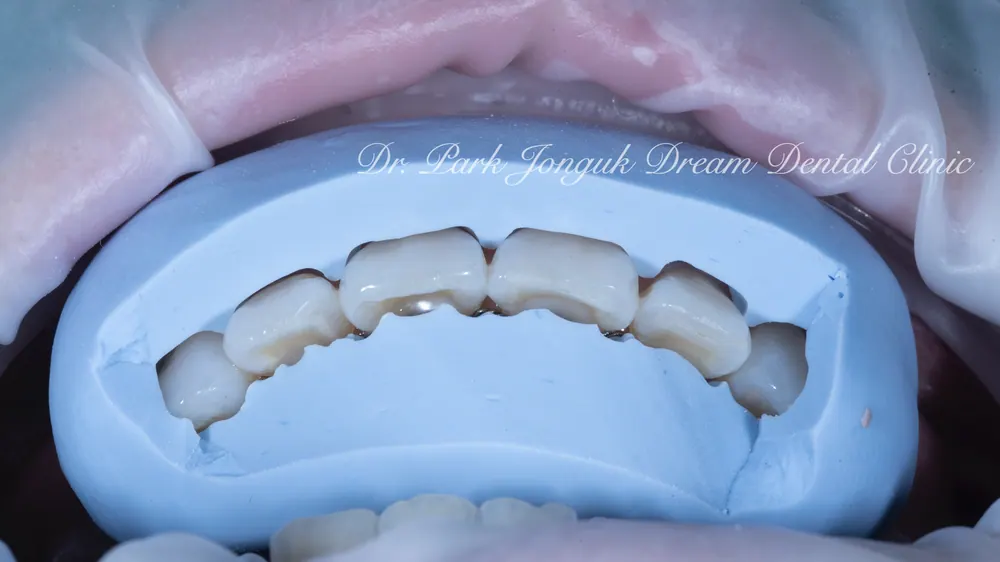
Using a tooth-reduction guide like this,
we have to continuously check how much of the tooth has been reduced.
There's another method I consider even more important than the guide.
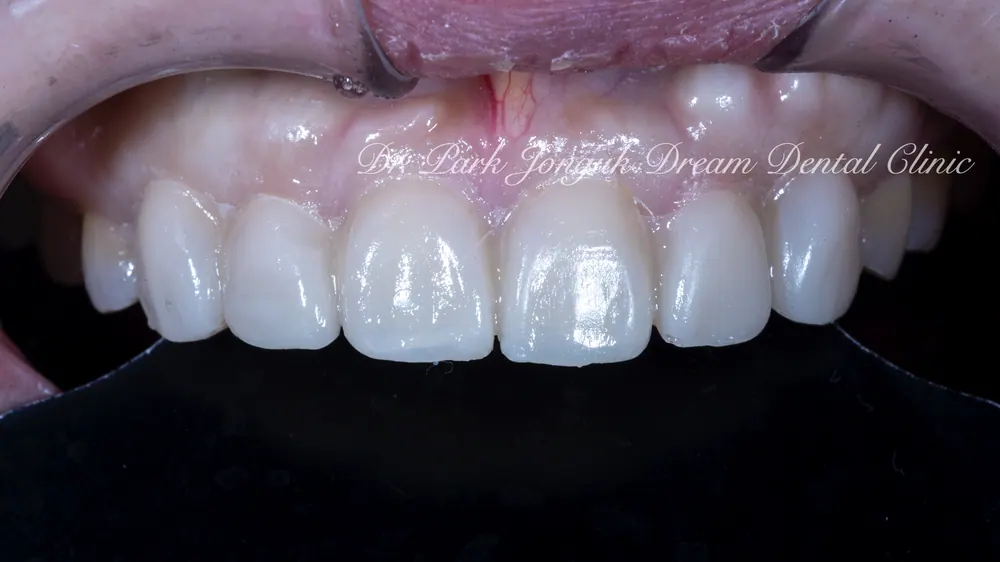
In the middle of the reduction process, we make temporary teeth like this.
By measuring the thickness of the temporary tooth,
we adjust the amount of reduction even more precisely.
I typically make about 3-4 of these temporary teeth,
reducing about 0.1-0.2mm each time,
always looking for a way to reduce even a little less.
Lastly, this is probably the most fundamental part of veneer reduction —
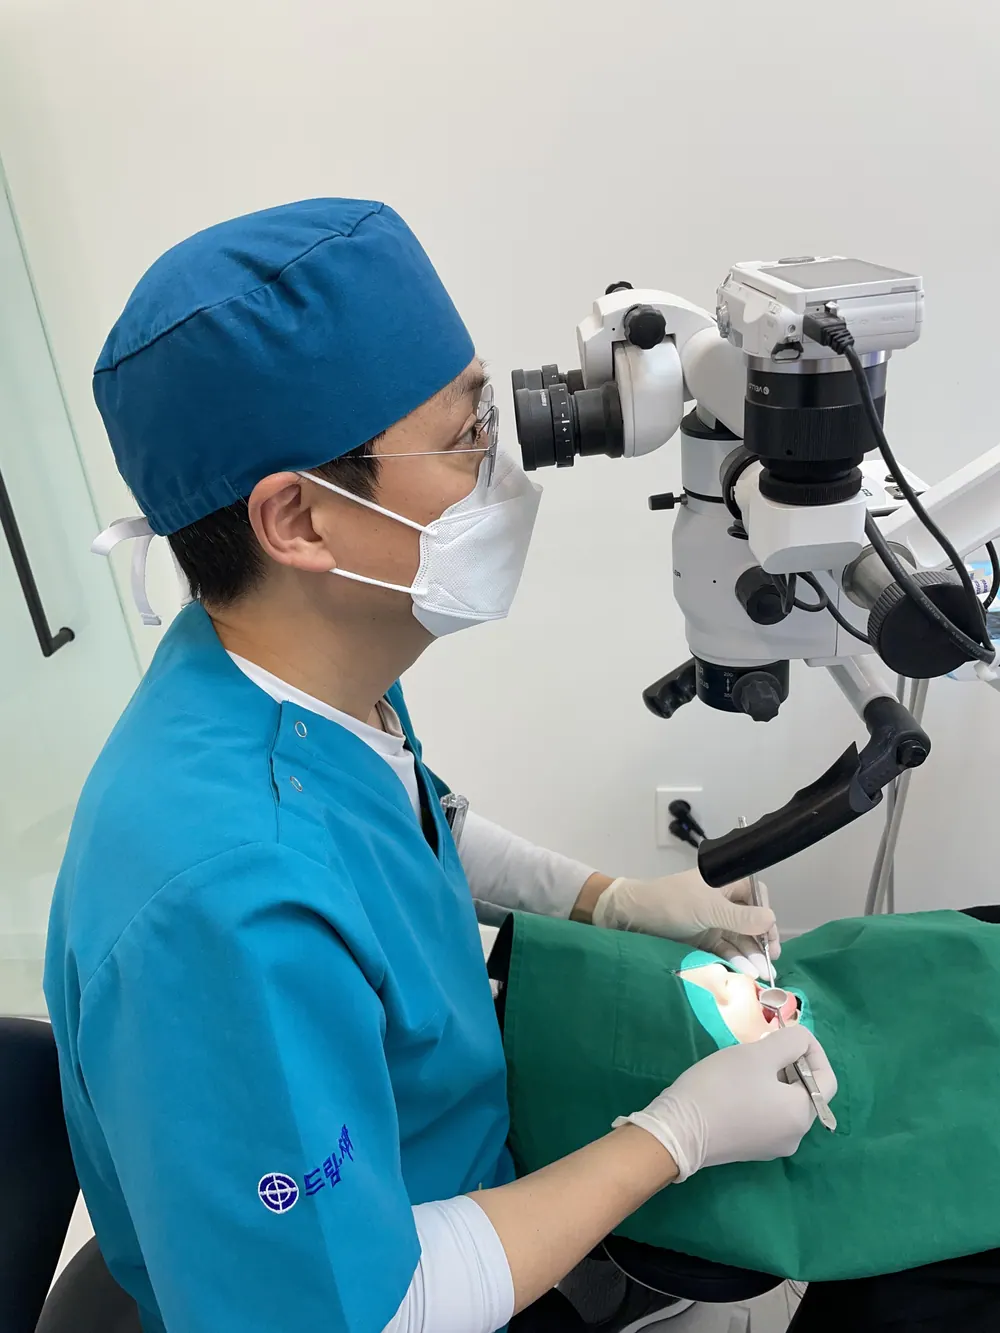
using a microscope.
With about 10x magnification,
tooth reduction can be done far more precisely than with the naked eye or loupes.
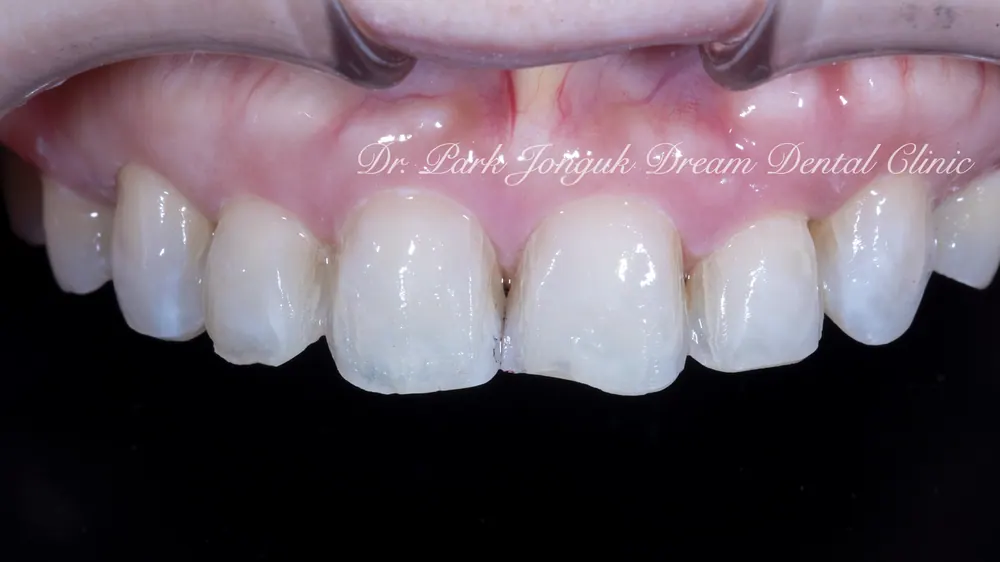
This is the state after the tooth reduction is finished.
Reduction is done exactly to the amount needed.
Depending on the tooth and the area, some parts weren't reduced at all,
while areas that needed more reduction were reduced a bit more.
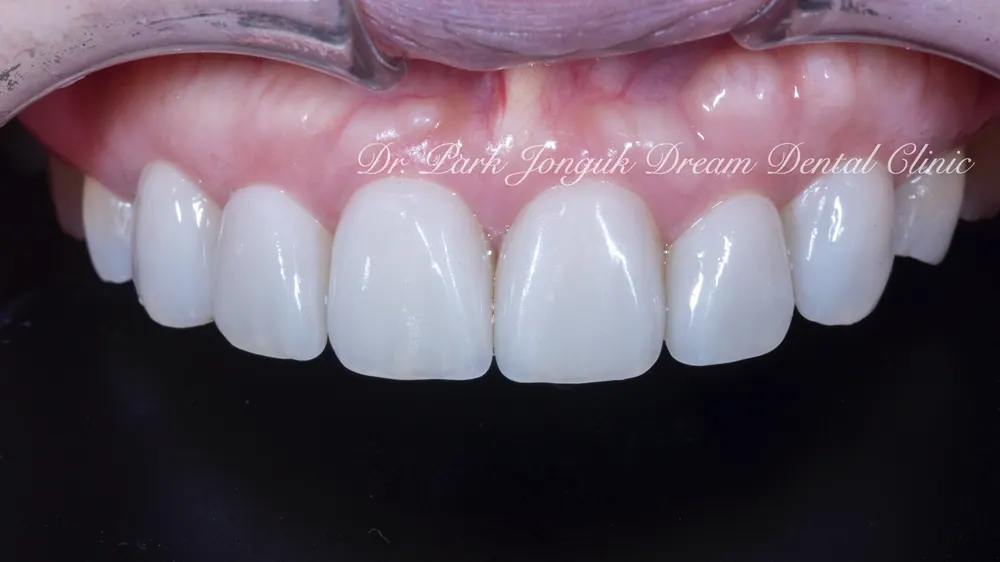
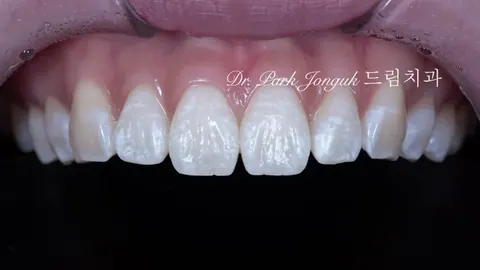
This is the result after minimal-reduction veneer treatment.
The shape of the teeth is now natural,
with a sense of dimensionality,
and the teeth are much brighter, even, and well aligned.
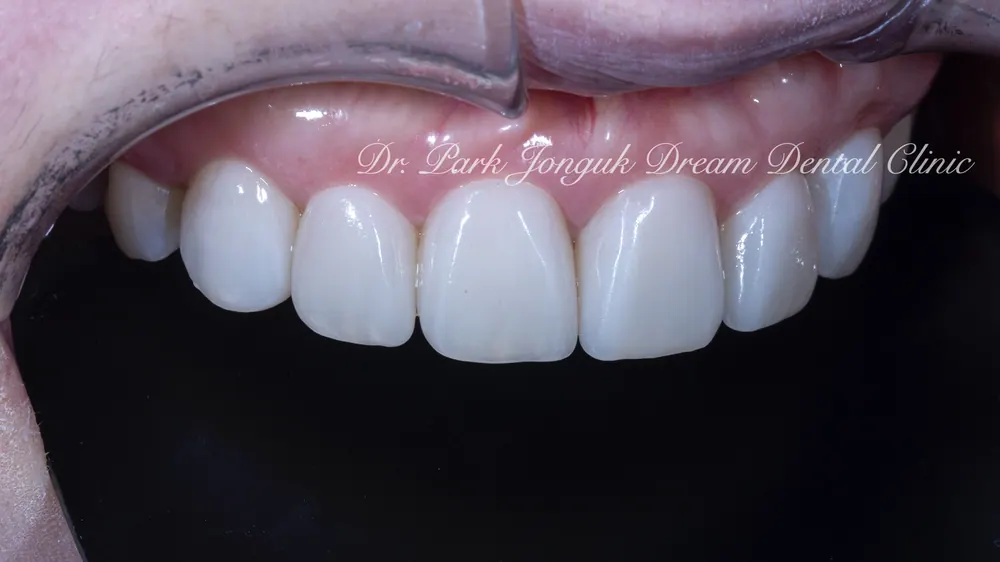
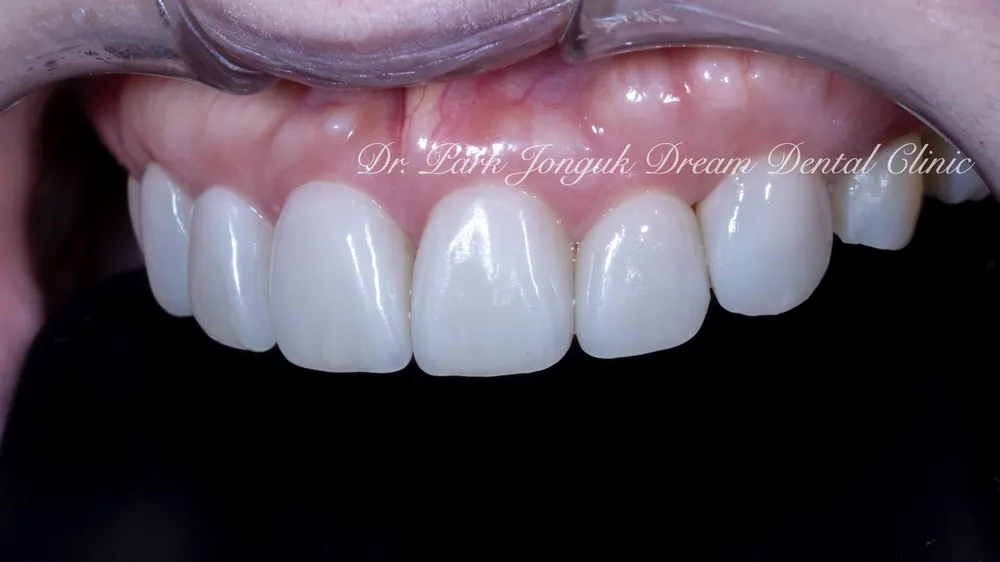
Rather than an opaque, plain-white,
artificial-looking veneer,
the treatment was finished with veneers that are natural yet beautiful.
The natural translucency also stands out.
Since 2006, Dream Dental Clinic
This article is a clinical note written by Dr. Park Jonguk of Dream Dental Clinic, Gangnam; the original was published on his blog. The photographs shown are real cases he treated. Results vary with each patient’s condition, and every procedure carries the possibility of individual variation and side effects.
Quick Consult
Request a Callback
Leave your number and we will call you back during clinic hours.
Request Received
We will contact you during clinic hours. For urgent matters, please call +82-2-3448-0028.