
Perfectly Closing Black Triangles With No-Prep Veneers -- A Real Case of Veneers After Braces
Hello. I'm Park Jonguk, director of Dream Dental Clinic, who has practiced esthetic dentistry in Apgujeong for 20 years
Today I'd like to introduce a special veneer-after-braces case where a black triangle
was resolved using no-prep veneers.
A Black Triangle That Appeared After Braces — the Concern
This patient was a woman in her 50s
who came in because a black triangle had appeared after orthodontic treatment and it was quite large.
Orthodontic treatment had made her teeth beautifully aligned,
but dark triangular gaps had opened up between the teeth.
This is what's known as a black triangle.
The patient said, "My teeth got beautifully aligned with the braces,
but now I'm bothered even more by the gaps between them," and it had become a real source of stress for her.
The black triangles showed when she smiled,
food kept getting caught in them, and above all, they made her look older — that was her biggest worry.
The Three Conditions for No-Prep Veneers
This patient met all three conditions for no-prep veneers perfectly.
First, small teeth.
Her teeth had become well-aligned through orthodontics, but they were on the small side to begin with.
Second, an even bite.
The orthodontic treatment had made her alignment very even and neat.
Third, a retroclined bite.
The braces had left her teeth tilted inward.
When these three conditions line up, veneers can be bonded on with almost no cutting of the tooth.
Black Triangles: The Hardest Challenge for No-Prep Veneers
But there was one major problem here.
Black triangles are extremely difficult to treat with no-prep veneers.
Normally, to close a black triangle with a veneer,
the surfaces between the teeth all have to be reduced.
That's because filling the gap between the teeth requires making room there for the veneer to sit.
But once the tooth is reduced, it's no longer "no-prep."
Solving the black triangle without cutting the tooth at all — that was the biggest challenge in this case.
Before Treatment: Severe Black Triangles
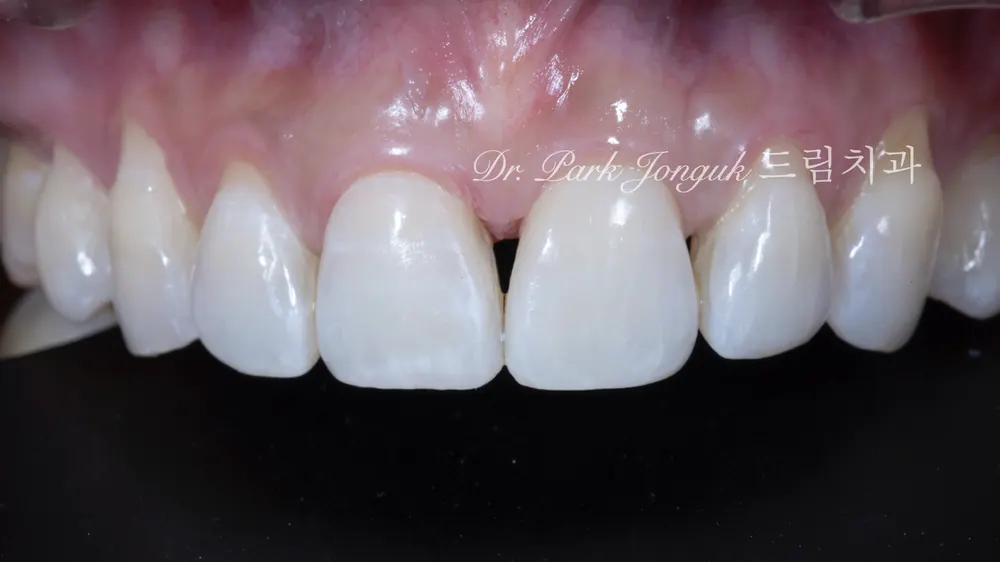
Photo 1 is the before-treatment photo.
The alignment is even from orthodontics, but large black triangles are visible between the teeth.
In particular, large triangular gaps appeared between the six front teeth, standing out noticeably when she smiled.
The teeth are even, but the gaps actually make the smile look more awkward.
Precise, Thin Veneers — the Essence of Handmade Work
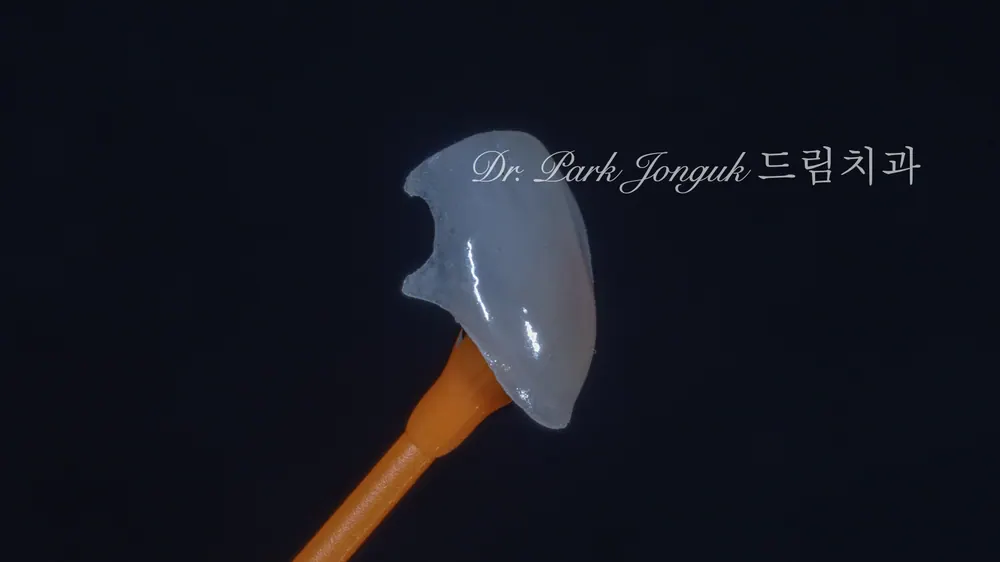
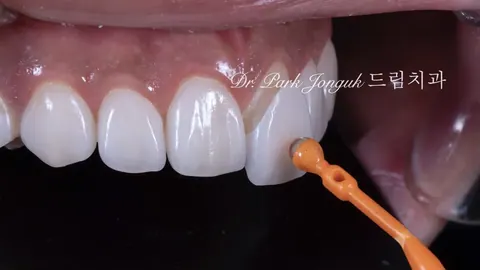
Photo 2 shows the veneer made to extend inward into the black triangle area.
A standard veneer covers only the front surface of the tooth.
But solving a black triangle requires filling the space between the teeth as well.
So we made the veneer extremely precise and thin.
We designed it not just to cover the front surface, but to extend into the space between the teeth as well.
This is an advantage only handmade work offers, something a same-day method could never match.
Because the same-day method mills a single block by computer,
it can't produce a shape this complex and precise.
But because handmade work is crafted piece by piece, by hand, by a skilled dental technician,
it's possible to make a veneer that fills even the space between the teeth with precision.
The thickness is under 0.3mm, extremely thin.
It's as thin as paper, but the strength is more than sufficient.
Making an ultra-thin veneer like this extend all the way into the space between the teeth truly requires a high level of skill.
Checking by Placing Each Side On, One at a Time
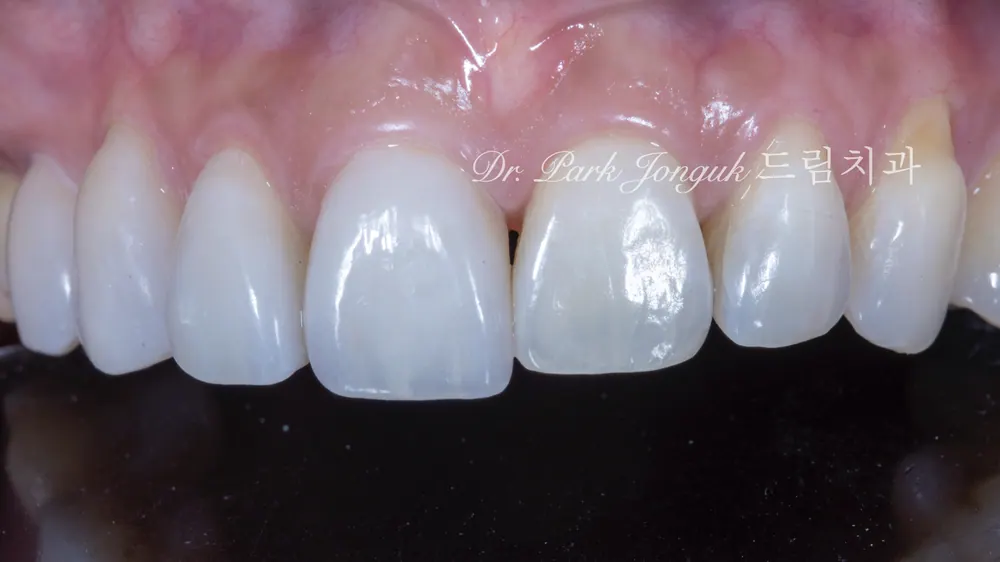
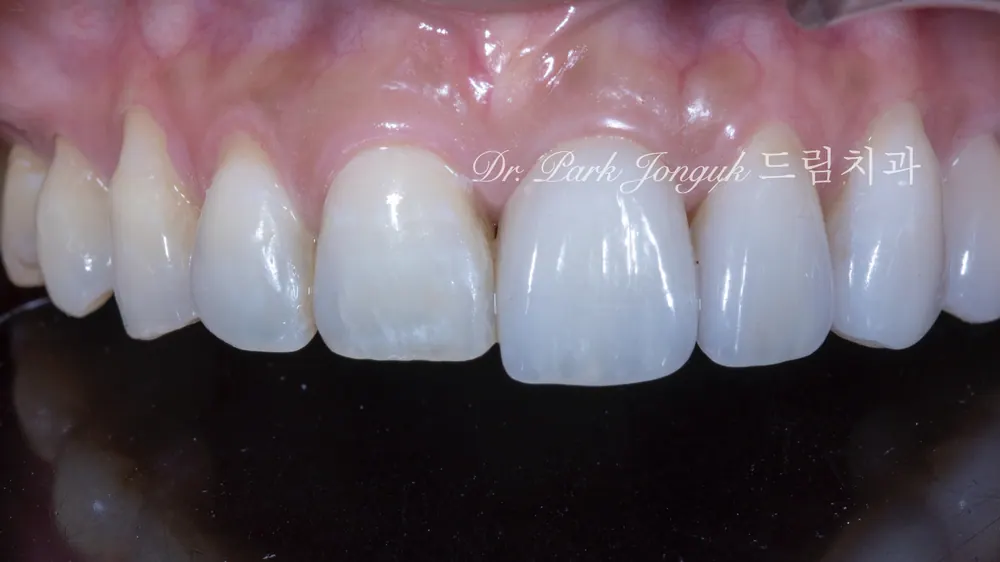
Photos 3 and 4 show the finished veneers placed on just the right side, then just the left side,
showing how the black triangle is resolved.
This is the process of checking the veneers by simply placing them on before actually bonding them.
This is called a try-in.
Comparing the side with just the right veneer placed to the side with just the left veneer placed,
the black triangle disappears completely on the side with the veneer, while the gap is still visible on the side without one.
This process let the patient see for herself, "The black triangle really is being resolved."
Wrapping Perfectly Around to the Sides
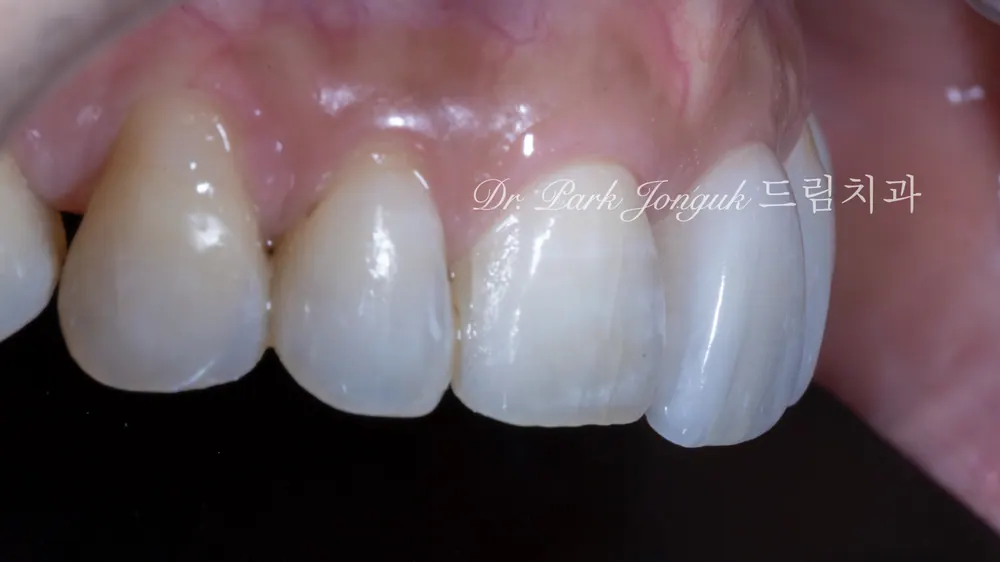
Photo 5 is a side view with the veneer for tooth #21 (the left central incisor) placed on.
You can see that the veneer wraps well around not just the front, but the side of the tooth as well.
It extends thinly into the space between the teeth, filling in the black triangle area.
This thin extension is exactly what solves the black triangle.
Since the tooth wasn't cut at all, there was no space made for this part to sit in,
so we made it ultra-thin so that it would fit naturally into the space between the teeth.
Preparing for Seating: A Final Check
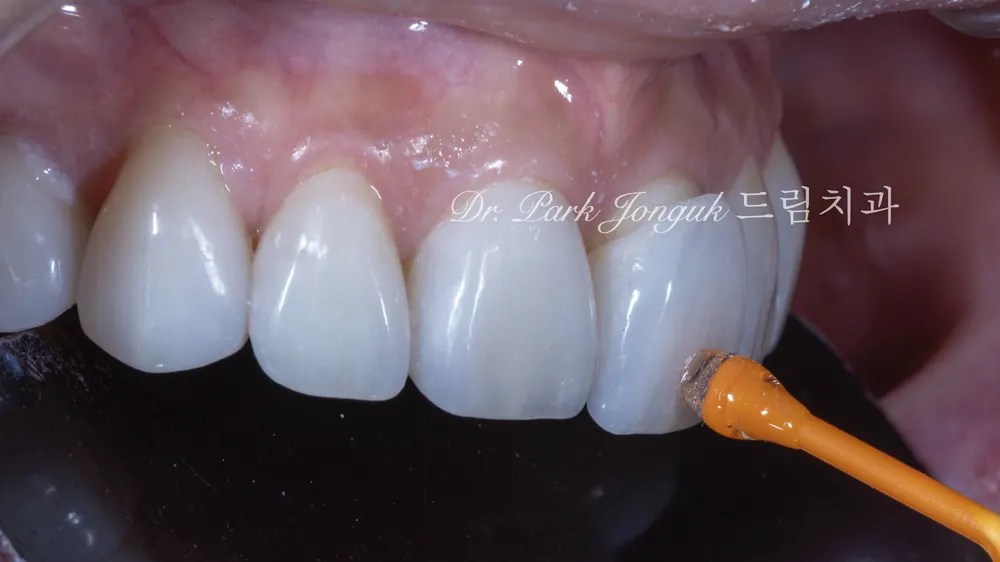
Photo 6 shows preparation for seating.
This is the process of checking every veneer once more before final bonding.
We do a final check to confirm all six veneers were made perfectly,
that the black triangles are properly filled, and that the color and shape look natural.
The patient looked in the mirror as well,
and expressed her anticipation, saying, "The black triangle is really gone."
Seating Day: A Perfect Result
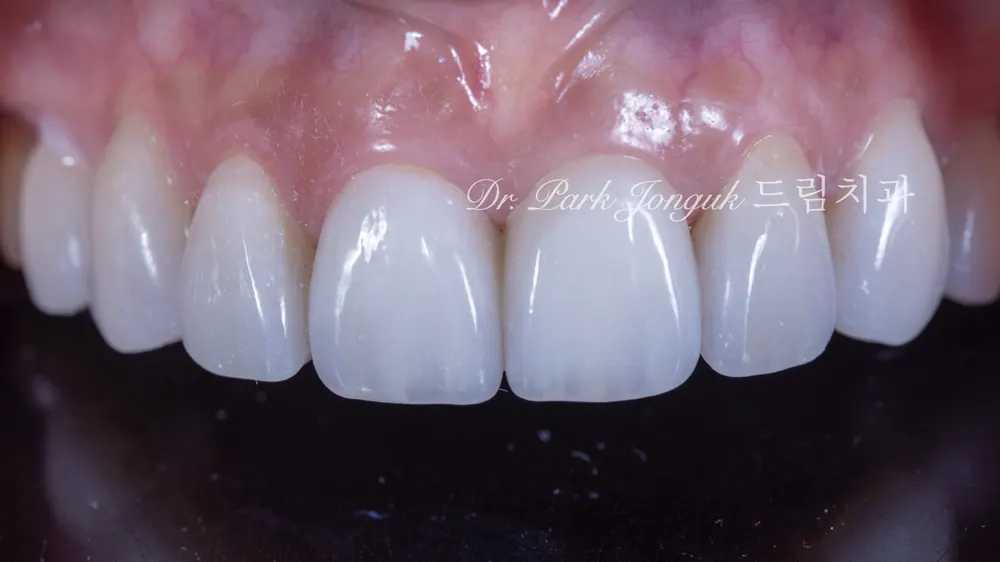
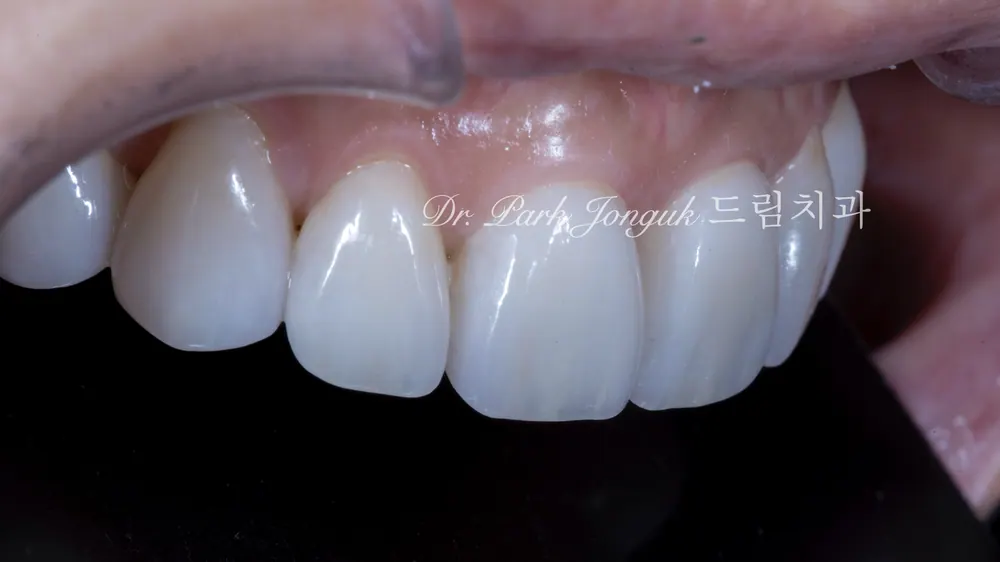
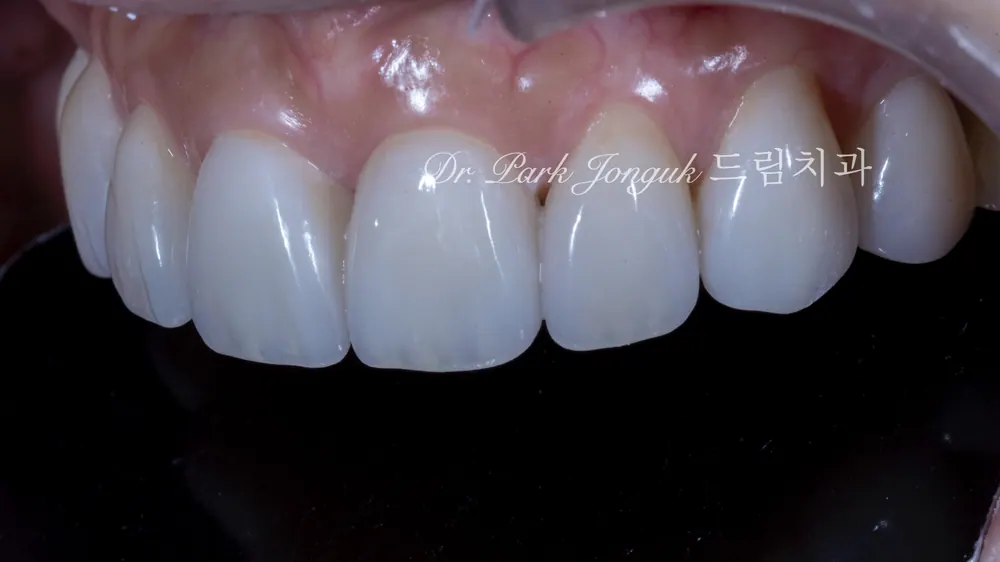
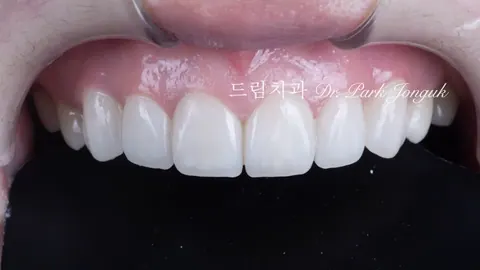
Photos 7, 8, and 9 were taken on seating day.
This is the result after the veneers were finally bonded in place.
The black triangles were resolved naturally and beautifully.
The dark triangular gaps between the teeth disappeared completely, and the teeth now look naturally connected.
The color is perfect too — natural enough that it's indistinguishable from her original teeth.
The translucency comes through as well, so it doesn't look artificial.
The shape is elegant too. The teeth are even, yet natural,
and the smile curve came out beautifully.
When the patient looked in the mirror, she was genuinely thrilled, saying, "I look ten years younger."
She said, "It's so much prettier than when I'd just finished the braces."
Still Perfect Five Years Later
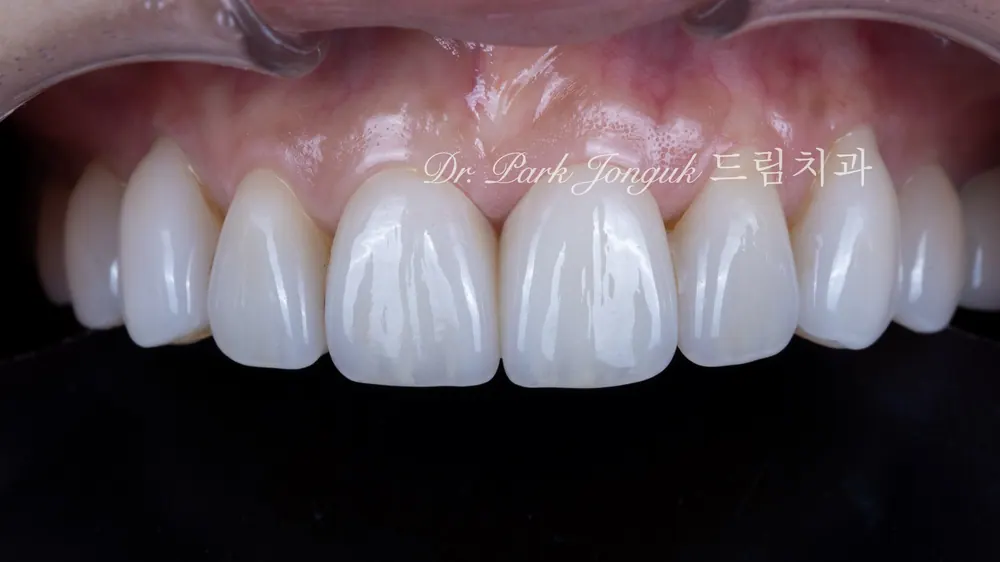
Photo 10 is from five years later. It's still holding up perfectly, with no issues.
The black triangles haven't come back,
and the veneers remain perfectly bonded, with no discoloration or coming loose.
The color is still just as natural.
Because these were no-prep veneers, her tooth health has been perfectly preserved as well.
Even after five years, there's no tooth sensitivity or gum trouble at all.
At every regular checkup, she tells us, "Getting these veneers was the best decision of my life," expressing her satisfaction.
Black Triangles Can Be Solved Without Any Tooth Reduction
Many people assume, "Fixing a black triangle means cutting a lot of tooth structure."
But as this case shows, when the conditions line up, it's possible without any reduction at all.
The key is fabricating a precise, thin veneer.
It has to be designed to extend into the space between the teeth, and made ultra-thin, under 0.3mm.
This is only possible with handmade work.
A same-day method or computer milling simply can't produce a shape this complex and precise.
Veneers After Braces: A Perfect Combination
Orthodontic treatment makes the teeth beautifully aligned,
but it can bring side effects like black triangles.
This is especially common in adult orthodontics, where gaps often open up between the teeth.
Veneers after braces can solve this problem completely.
On top of the even alignment gained from orthodontics,
veneers close the black triangles and improve the color and shape as well.
In particular, teeth often end up retroclined after braces, which creates ideal conditions for no-prep veneers.
Who We Recommend No-Prep Veneers For
No-prep veneers are especially good for the following types of patients.
First, someone who developed black triangles after braces.
As in this case, the gaps can be filled without cutting the teeth at all.
Second, someone with small or undersized teeth.
Since the treatment enlarges the teeth, no reduction is needed.
Third, someone who wants to preserve as much of their natural teeth as possible.
It's the best choice for anyone who doesn't want a healthy tooth cut down.
Fourth, someone who only wants to improve color and shape.
It's well suited to cases where the tooth position is fine but the esthetics need improving.
Don't Let Black Triangles Worry You Any Longer
So many people struggle with black triangles after braces.
Many say, "I got braces, but now I'm even more bothered by the gaps between my teeth."
But now there's a solution.
No-prep veneers can resolve black triangles naturally without cutting the teeth at all.
Having treated countless black triangle cases over 20 years,
I've become convinced that solving them without any reduction is the ideal approach.
It protects tooth health while also achieving esthetics — a genuine two-for-one benefit.
Frequently Asked Questions (Q&A)
Q1. Don't no-prep veneers come off easily?
A. With the proper bonding process, they're just as strong as standard veneers.
This case, too, has held up without any problems for five years now.
Q2. If a black triangle is solved without reduction, won't the space between the teeth look too thick?
A. Because it's made ultra-thin (under 0.3mm) and only extends into the inner space between the teeth, it doesn't look thick at all.
If anything, it looks natural.
Q3. Can veneers be done right after braces come off?
A. It's best to wait through a retention period of at least six months after finishing orthodontics before getting veneers.
Treatment should proceed only after the teeth and gums have stabilized.
This article was written based on the actual clinical experience of a dentist who has practiced esthetic dentistry in Apgujeong for 20 years. Every month at Lamista Academy, I lecture fellow dentists on no-prep veneer techniques, and I have published Korea's first veneer textbook.
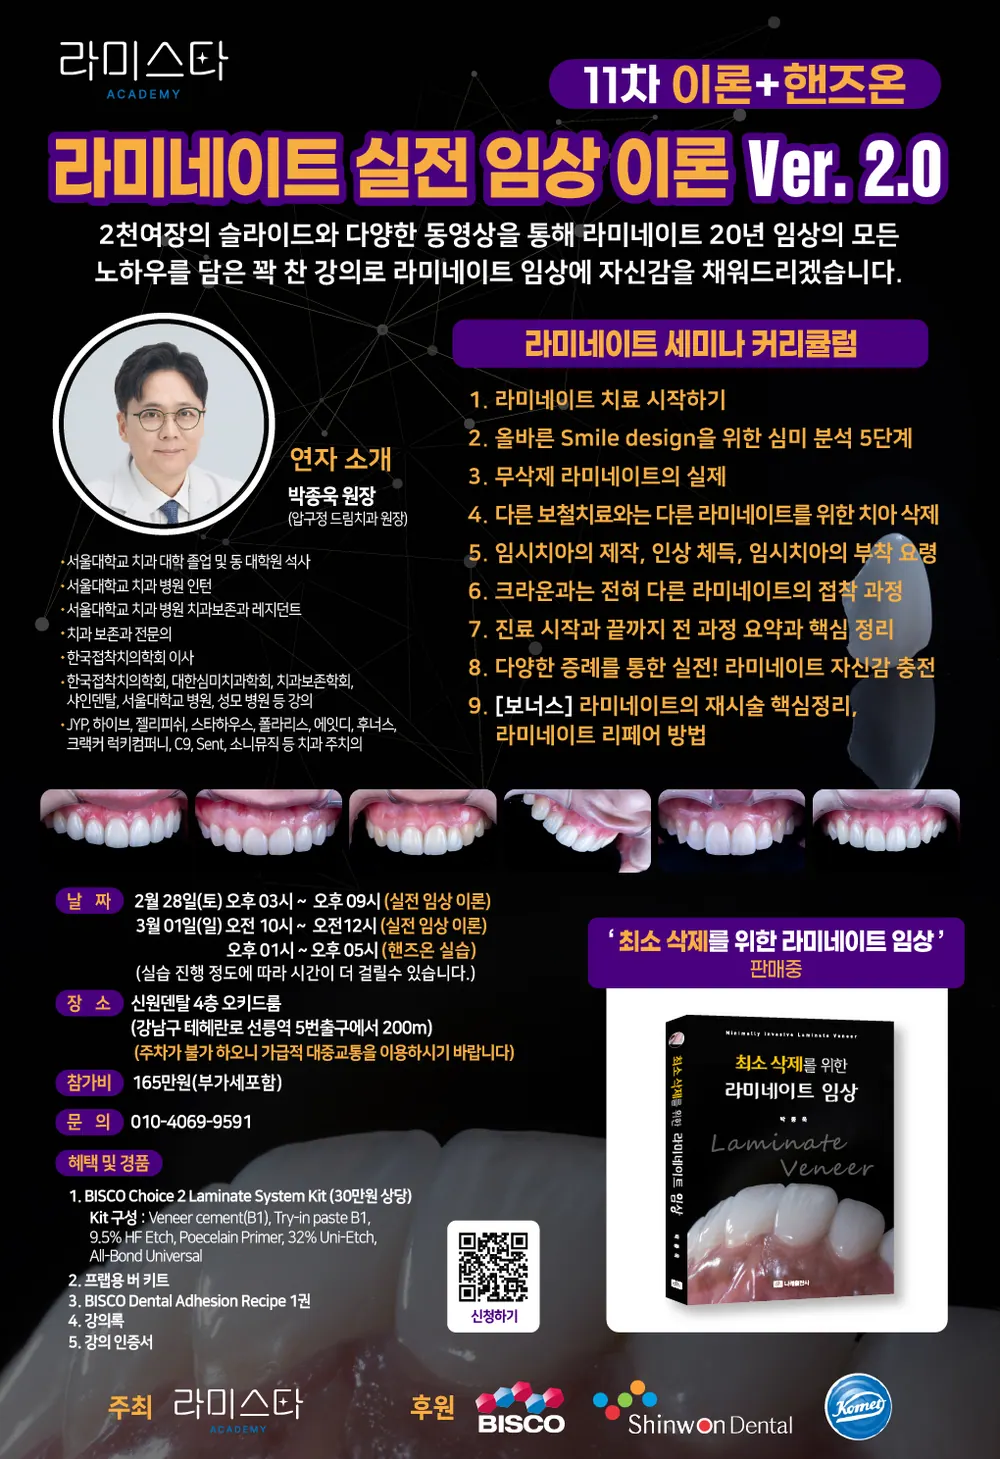
This article is a clinical note written by Dr. Park Jonguk of Dream Dental Clinic, Gangnam; the original was published on his blog. The photographs shown are real cases he treated. Results vary with each patient’s condition, and every procedure carries the possibility of individual variation and side effects.
Quick Consult
Request a Callback
Leave your number and we will call you back during clinic hours.
Request Received
We will contact you during clinic hours. For urgent matters, please call +82-2-3448-0028.