
No-Prep Veneers: How to Minimize Tooth Reduction
Hello, I'm Park Jonguk, DDS, MS, director of Dream Dental Clinic.
One key factor in the long-term success of veneers
is how much tooth structure is reduced.
Among the layers of a tooth,
there is enamel and dentin.
The outermost layer of the tooth is enamel,
and the layer beneath it is dentin.
Enamel has a fairly hard structure,
and the dental adhesives used in clinics
can bond to it quite firmly.
Dentin has a relatively softer structure compared to enamel,
so structurally, the bonding strength of dental adhesive
is lower on dentin than on enamel.
Because of this difference in bond strength,
bonding should be done to enamel as much as possible,
but the more a tooth is reduced, the less enamel remains,
and bond strength drops as well.
Beyond that, the more dentin is exposed,
the higher the chance of side effects such as tooth sensitivity,
so minimizing tooth reduction is quite important in veneer treatment.
No-prep veneers are even better when possible,
but not every case allows it,
so we have to do our best to place veneers with only minimal reduction.
The problem is that in treatments that make large teeth look smaller,
keeping the reduction low is very tricky.
In these cases, the proportions between teeth need to be carefully adjusted
and the design must be worked out to make the teeth look as small as possible.
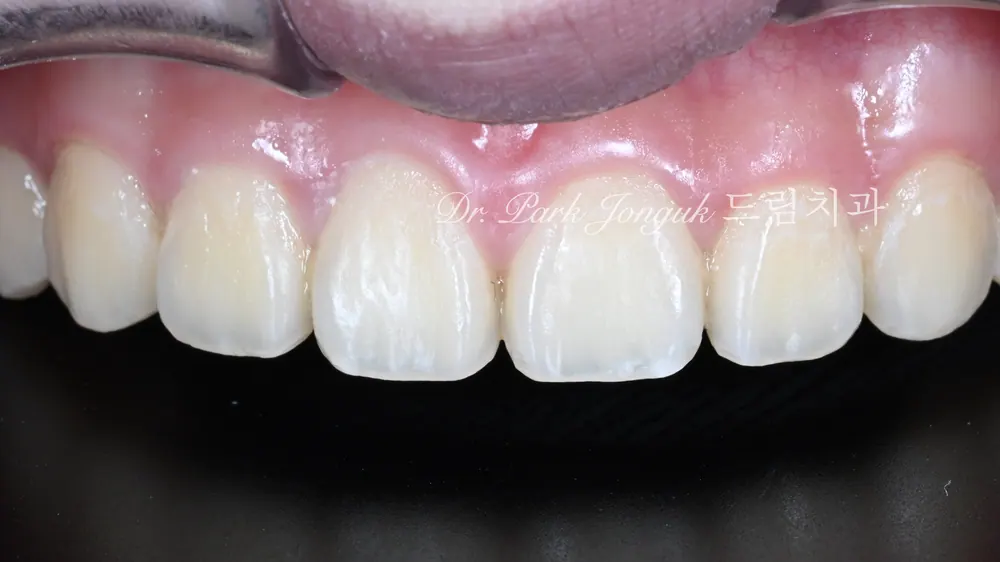
In this case, there were several reasons the patient wanted veneers.
First, tooth color was the biggest issue —
the patient said the yellowish tone did not go away even after whitening.
She wanted her teeth to be brighter.
Many white spots were visible on the teeth,
giving a noticeably uneven, unclean look.
An even bigger problem than that
was that the teeth were too large,
and the front teeth differed in size from each other.
They should be symmetrical,
but since the two front teeth were different sizes,
there was a significant esthetic problem.
No-prep veneer treatment that makes large teeth look smaller
is always very tricky and requires a great deal of thought.
Of course, if a lot of tooth structure is removed during treatment,
there is little to worry about,
but achieving the best possible result with as little tooth reduction as possible
really requires a great deal of care.
The proportions of the teeth are especially important.
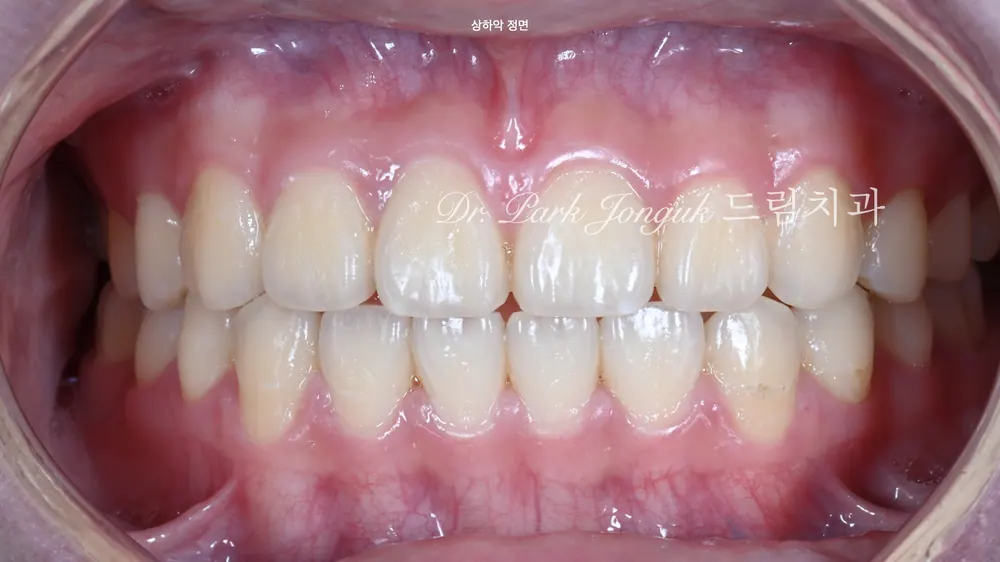
The color of the lower teeth was also quite yellow,
so we decided to treat both the upper and lower teeth with veneers.
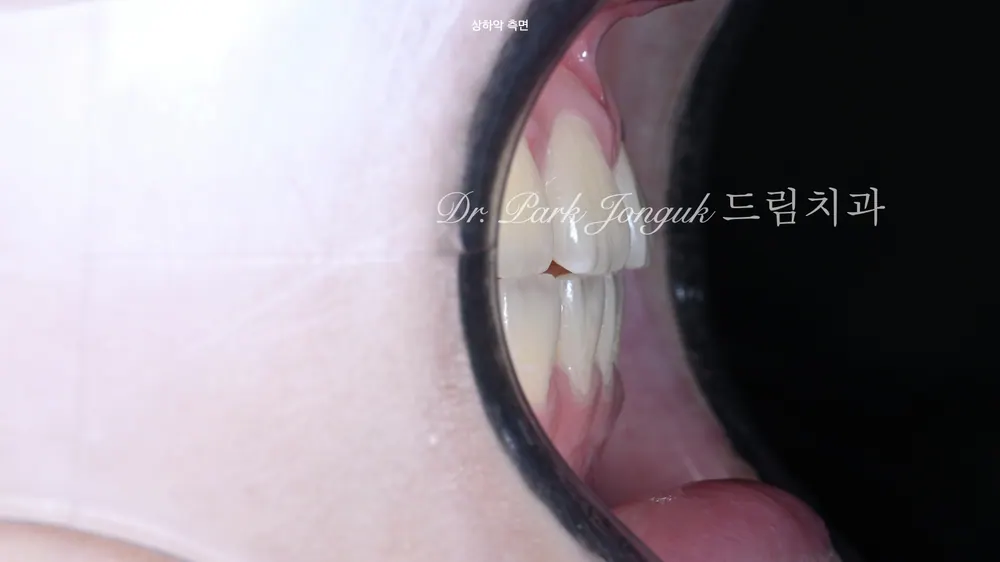
There were no major issues with the bite,
and there was enough space,
so the lower teeth did not need much reduction either in this case.
In general, veneers on the lower teeth require a larger amount of tooth reduction,
so in my practice I don't recommend them very often.
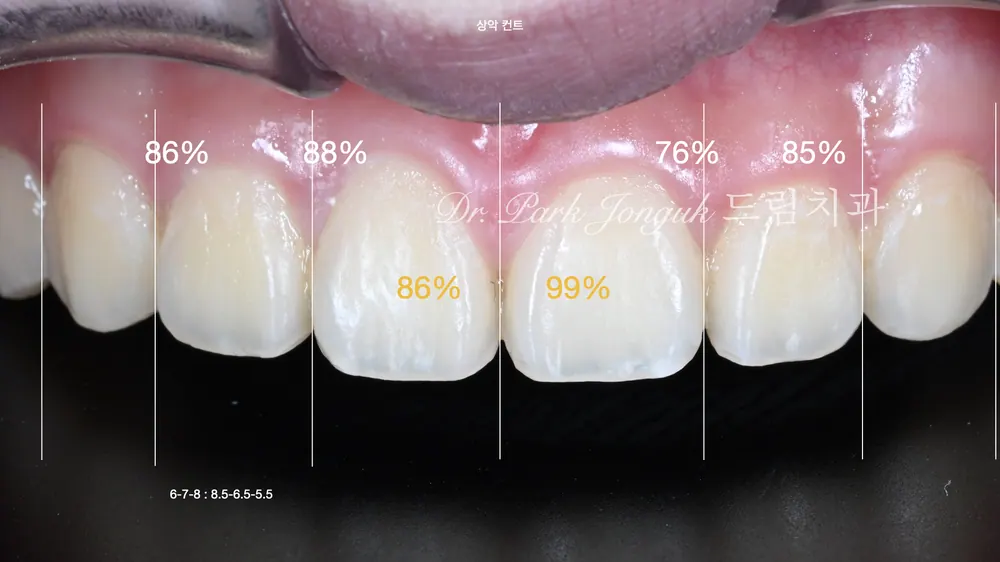
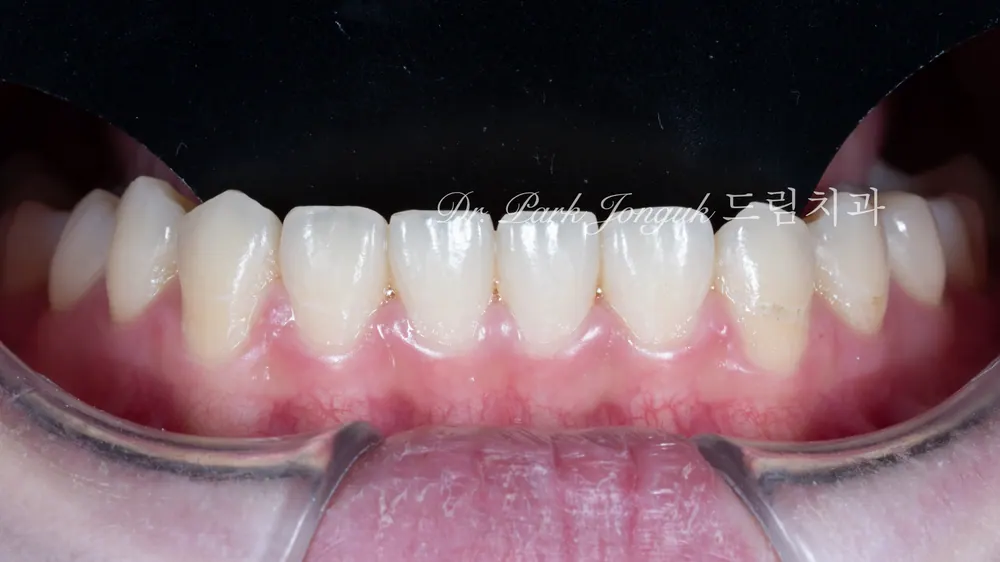
We carry out a digital analysis of the current teeth.
We need to identify the problems and establish a treatment plan
for how to solve them.
In this process, we anticipate both the amount of reduction and the expected result,
and discuss them with the patient.
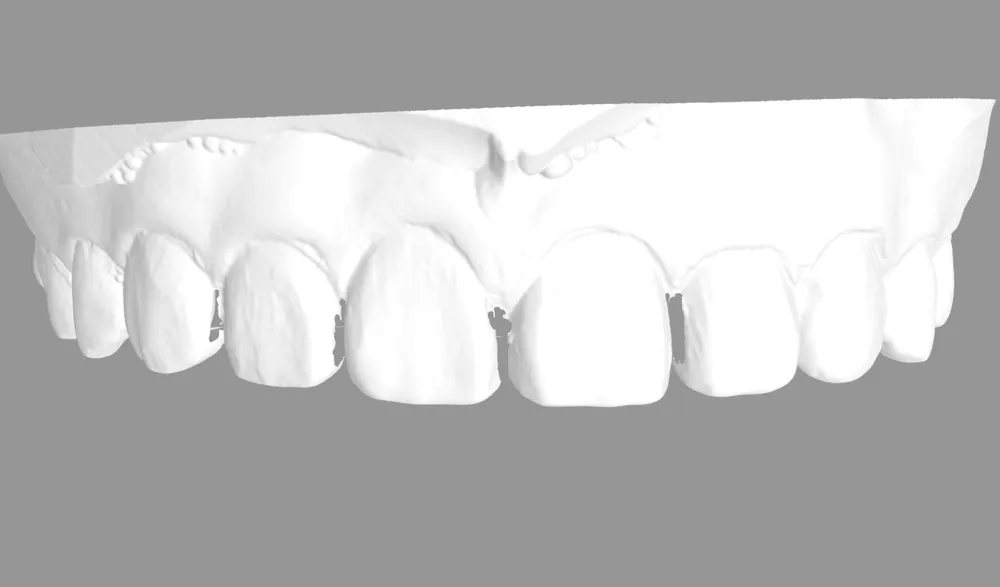
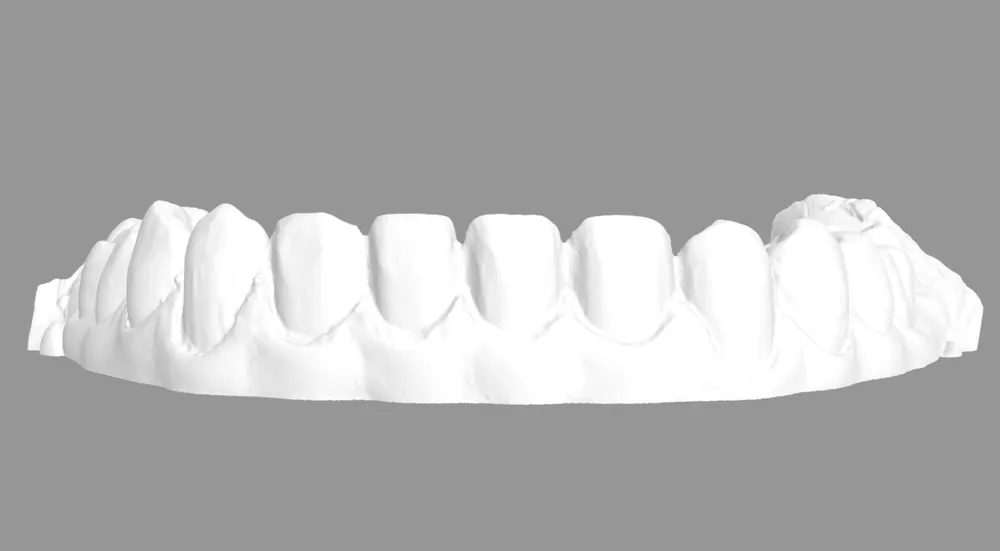
Checking the amount of tooth reduction in advance
is a very important step.
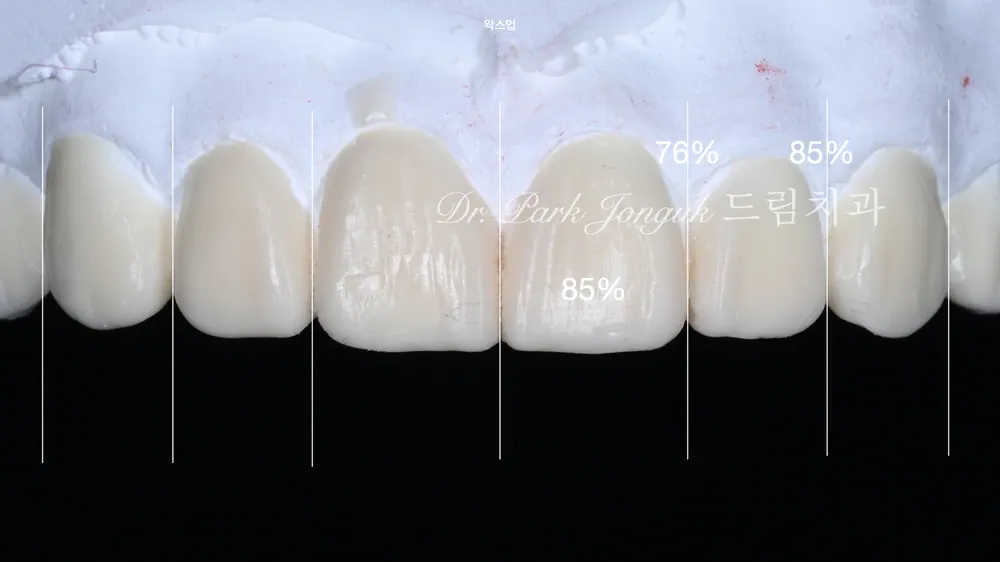
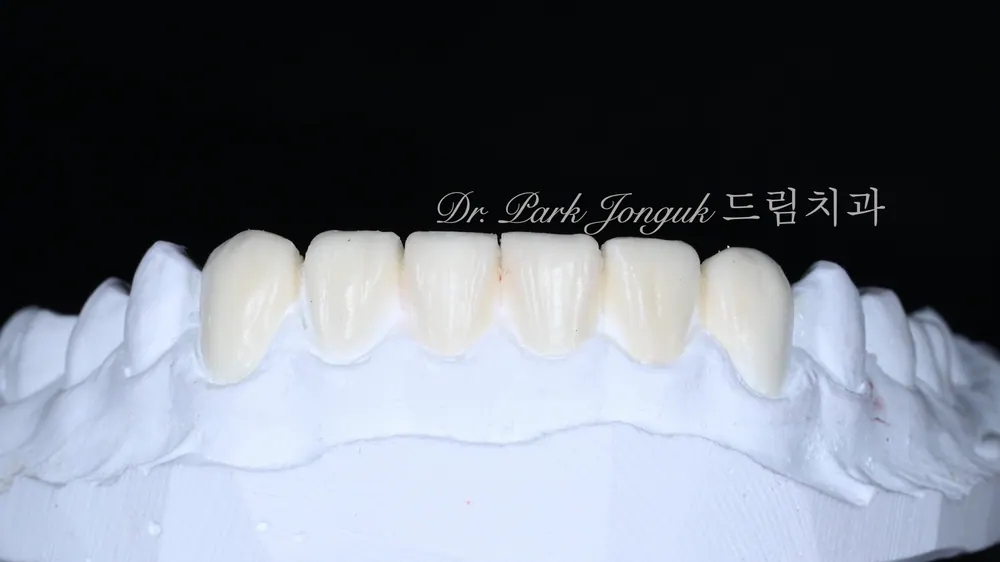
We use wax to mock up what the teeth will look like after veneer treatment.
This whole process is called a wax-up precision diagnosis.
It is an essential step in every veneer treatment,
and since it simulates the entire treatment process in advance,
it is an important part of preparing for precise treatment.
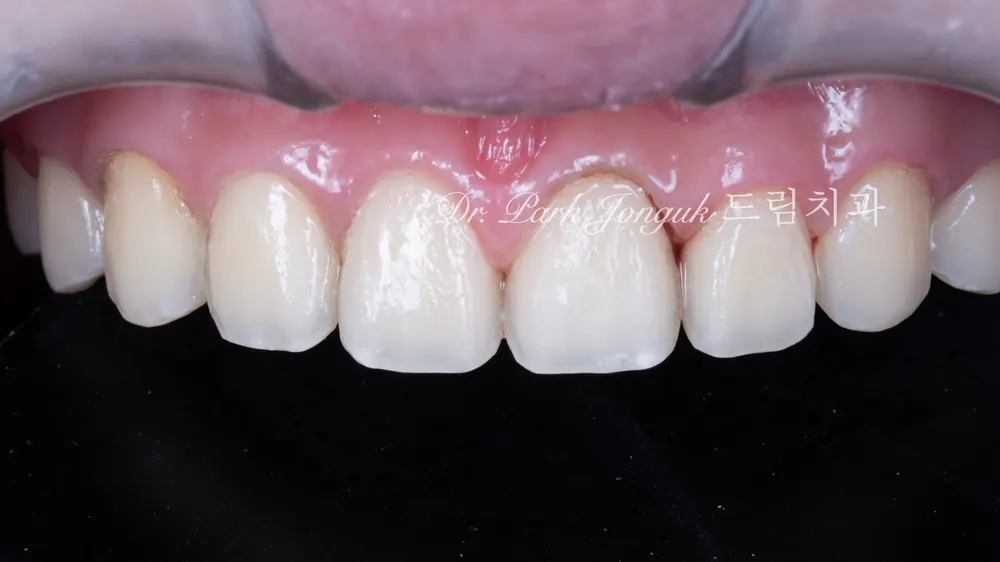
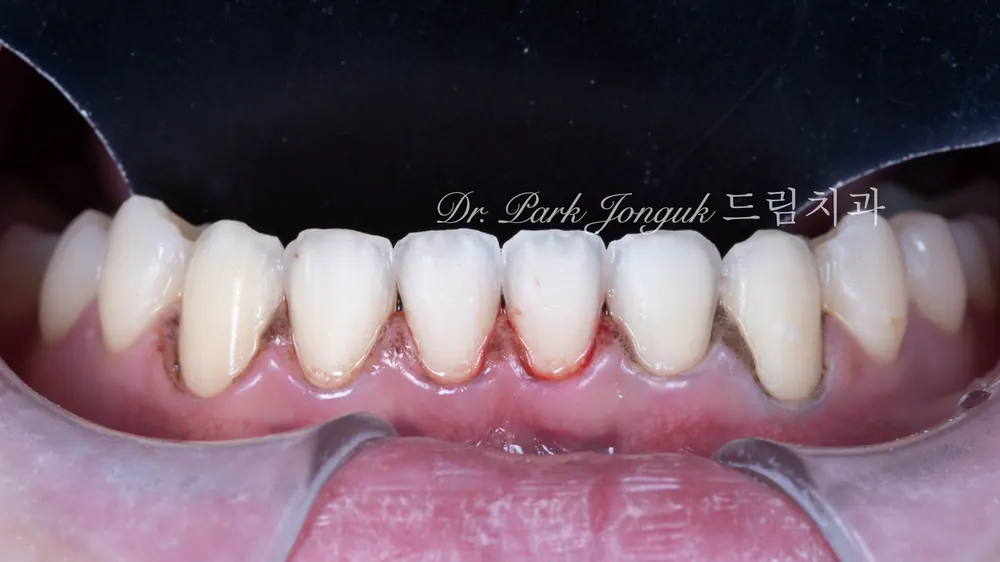
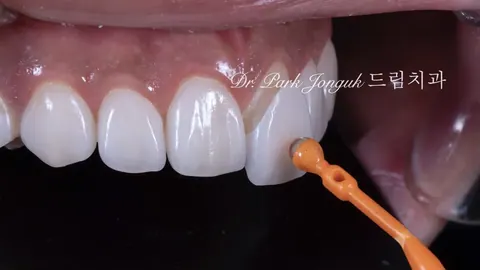
Tooth reduction is carried out according to the treatment plan.
For the upper teeth in this case, the reduction was so minimal
that it was close to a no-prep veneer.
Since the amount of reduction differs from tooth to tooth,
some areas had no reduction at all, while others had only minimal reduction.
Enamel remains on every tooth,
which markedly reduces the chance of debonding or fracture,
and greatly lowers the likelihood of other side effects as well.
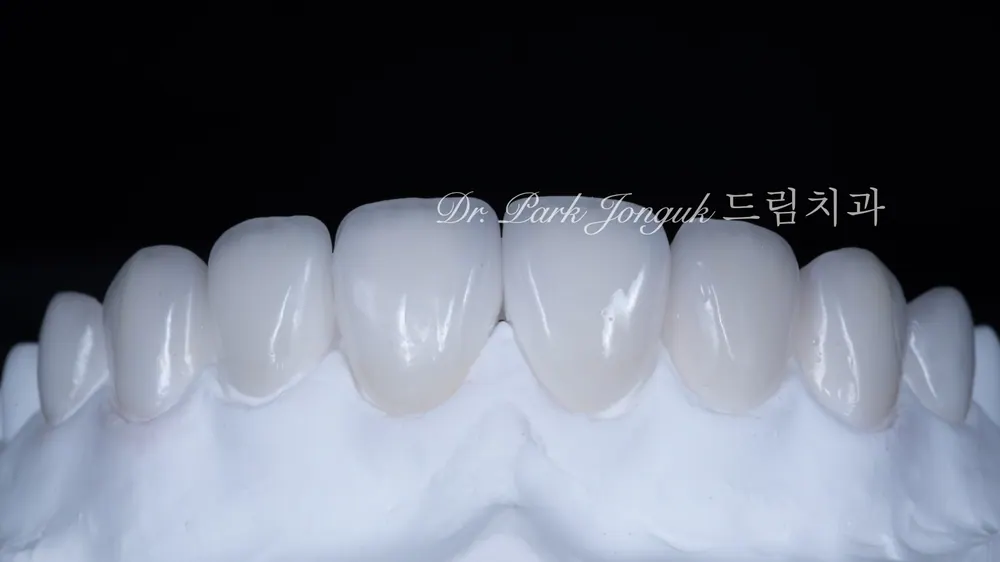
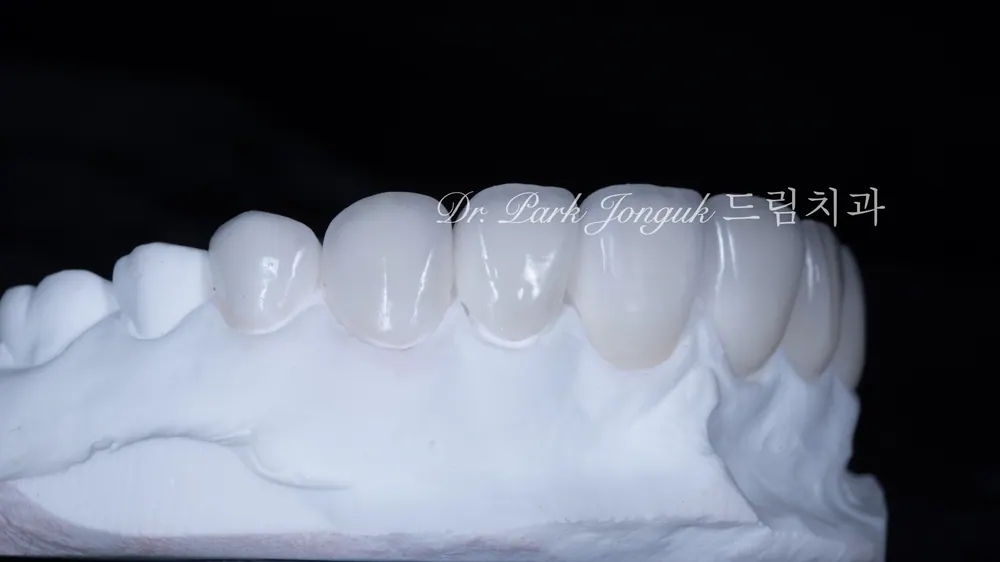
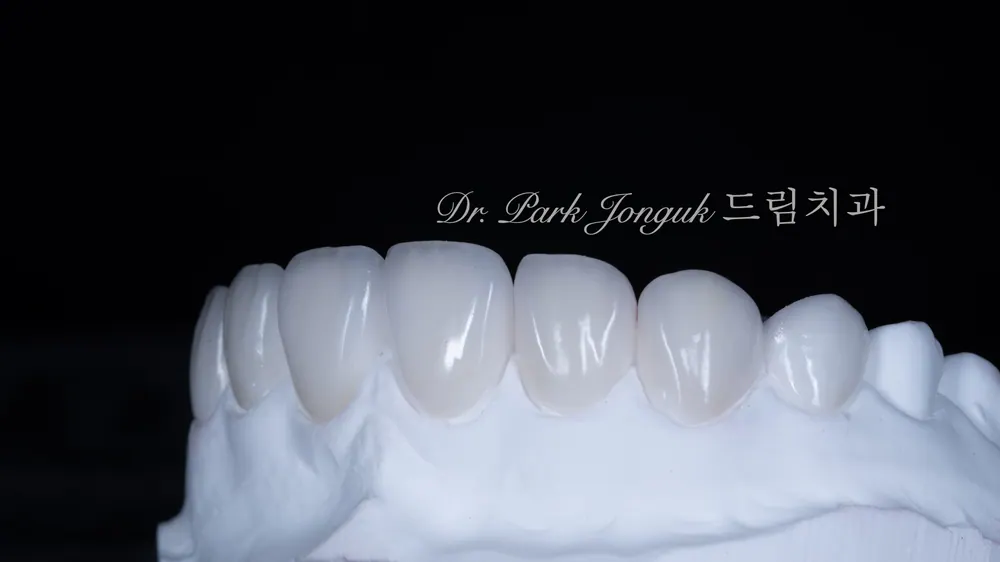
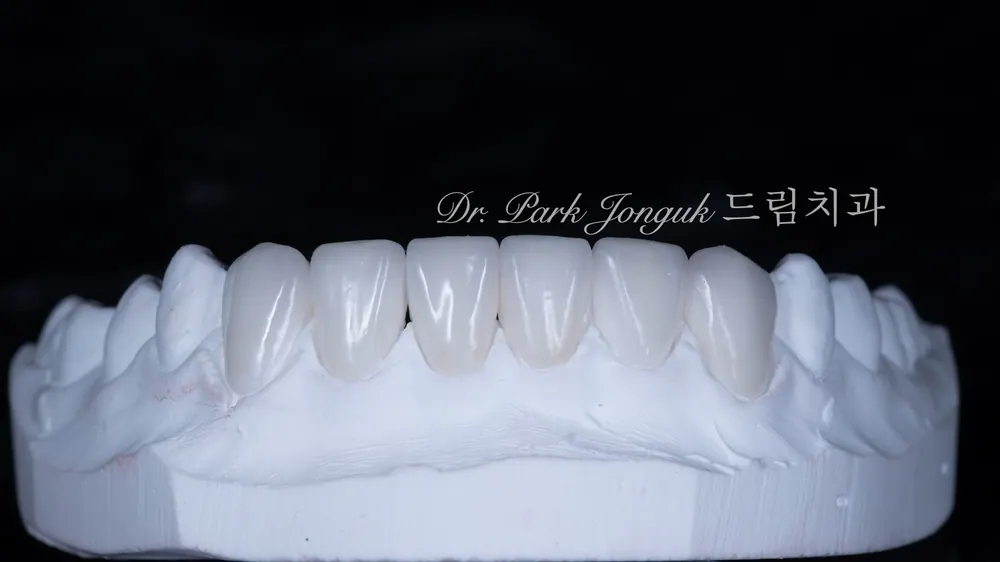
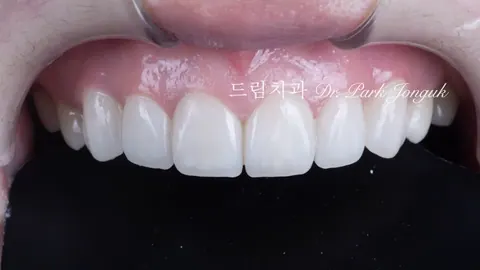
The minimal-reduction and no-prep veneers have now been completed.
They preserve as much of the natural tooth color and shape as possible.
To create the effect of teeth looking smaller,
a variety of textures and details are given to the teeth.
Setting the direction of the line angles,
the proportions between teeth,
and getting the width-to-height ratio of each individual tooth right are all very important.
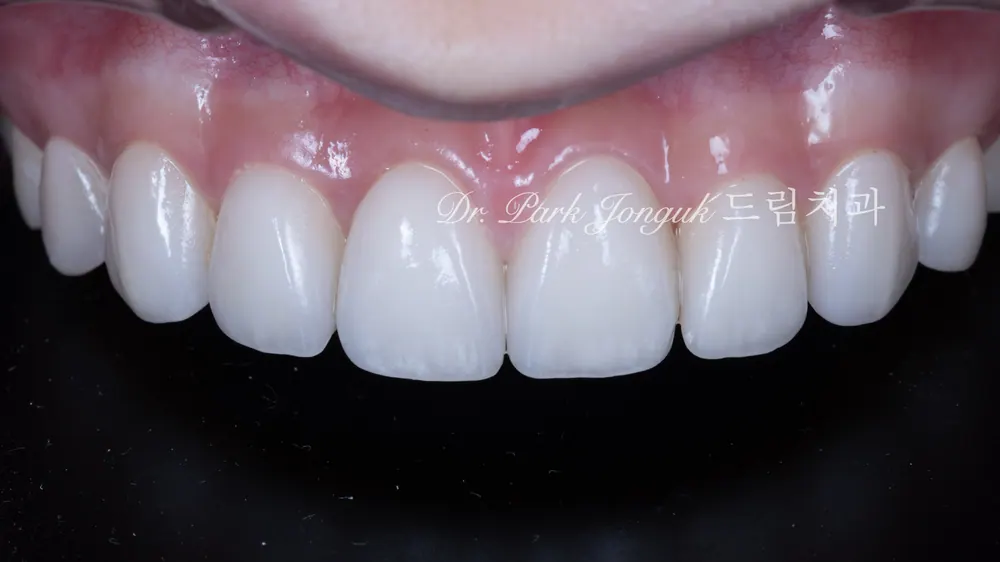
The minimal-reduction and no-prep veneers are now finished.
The teeth have become noticeably brighter and more vibrant.
You can see that the asymmetry in tooth size has also been fully resolved.
Compared to before,
the teeth now feel much cleaner and longer,
which shows how important adjusting the proportions really is.
It's not just that the teeth became brighter —
a strong sense of translucency was given to the tooth edges as well,
expressing natural, youthful-looking teeth.
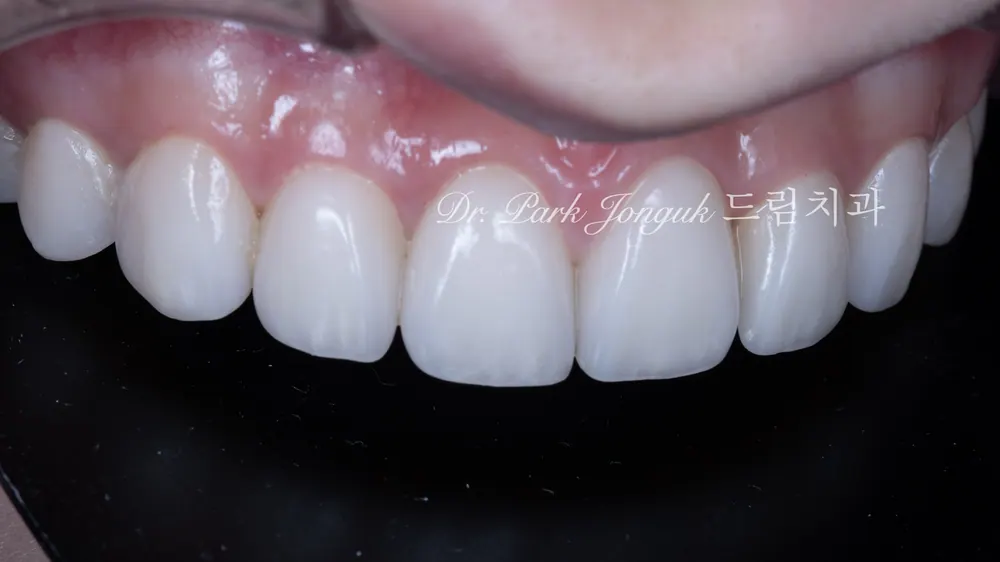
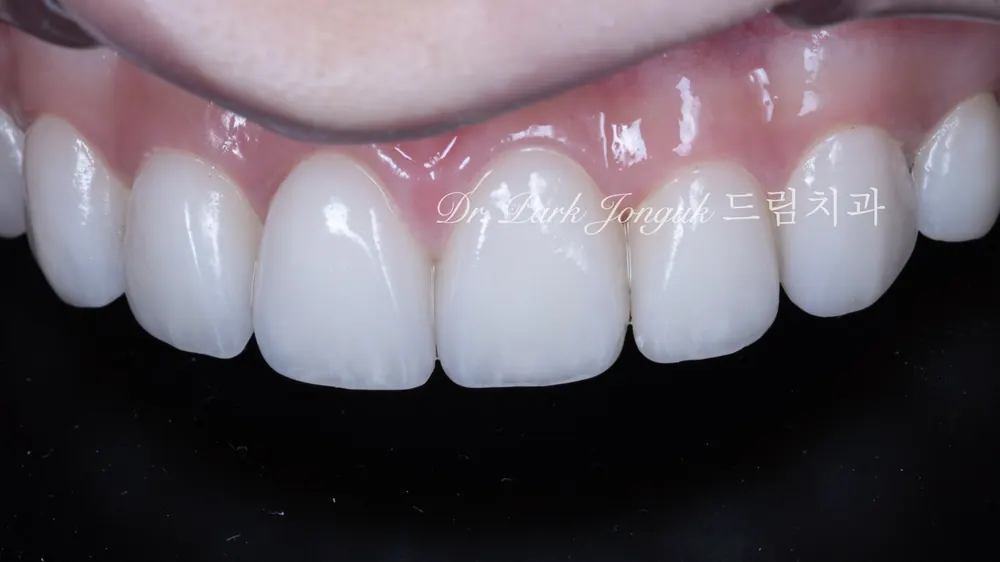
From various angles,
the teeth look natural, bright, and beautiful.
The translucency and bright color of the teeth harmonize well together.
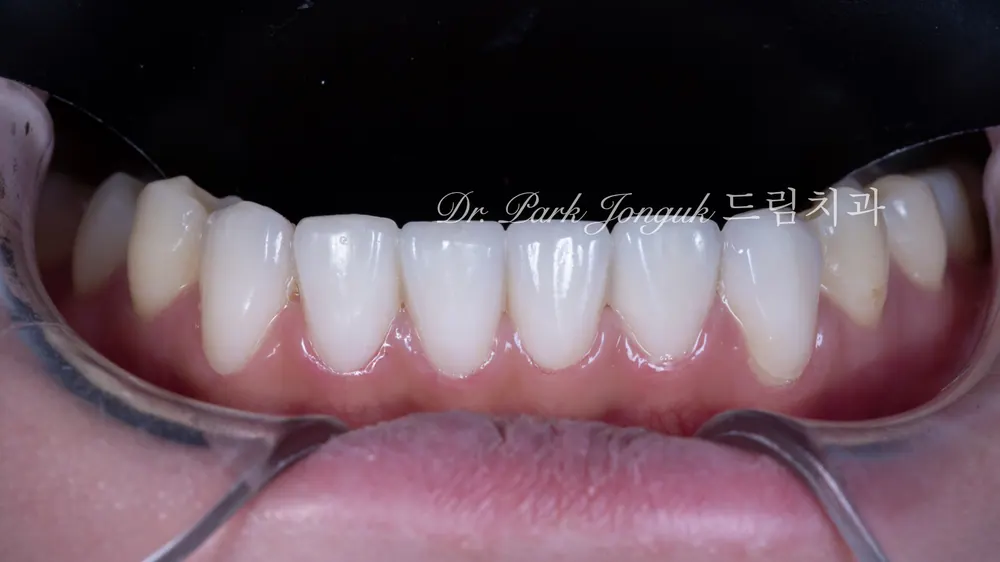
The lower teeth as well
were treated to look just as natural and beautiful.
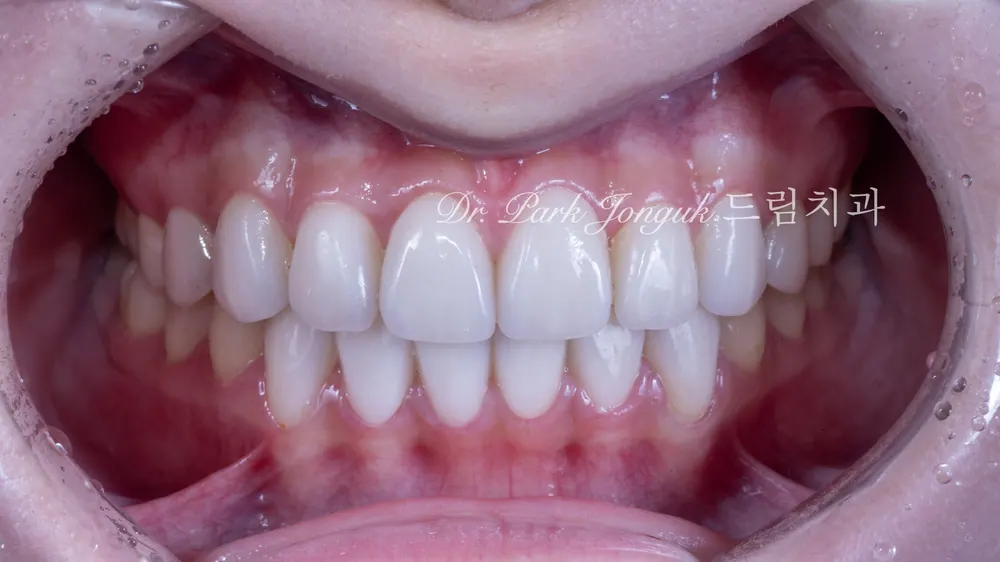
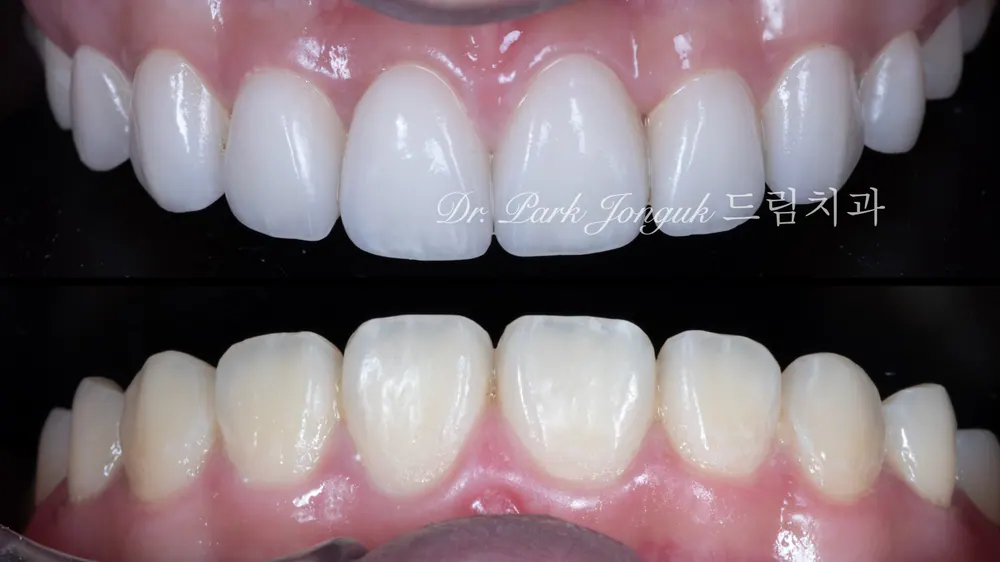
Comparing this to the original tooth color and shape,
you can see a clear and dramatic difference.
What matters here
is that this transformation was achieved
through no-prep and only minimal tooth reduction.
Both the health and the beauty of the teeth were preserved.
Natural beauty.
Since 2006, Dream Dental Clinic
This article is a clinical note written by Dr. Park Jonguk of Dream Dental Clinic, Gangnam; the original was published on his blog. The photographs shown are real cases he treated. Results vary with each patient’s condition, and every procedure carries the possibility of individual variation and side effects.

Quick Consult
Request a Callback
Leave your number and we will call you back during clinic hours.
Request Received
We will contact you during clinic hours. For urgent matters, please call +82-2-3448-0028.